


Cook with
intention.
Curated parcels. Guided recipes. Real confidence in the kitchen. Your ingredients. Your schedule.
Why we created Chef's Parcel
Chef-designed spices and guided recipes. Fresh ingredients, on your terms.
We started Chef’s Parcel because weeknight cooking had stopped feeling like cooking. Recipes blurred together. Pantries filled with spices we never finished. The dishes we loved most, the ones with layered, chef-made flavor, felt just out of reach.
So we built something intentional.
A curated cooking parcel paired with a guided experience. Chef-designed flavors, measured and ready. Recipes meant to be enjoyed, not decoded.
Most meal kits decide when you cook. Ingredients arrive on their timeline, ready or not.
We designed Chef’s Parcel differently.
Your parcel is ready when you are. The flavors are prepared. The experience is set. You bring the fresh ingredients, on your terms.
When it’s time to cook, your ingredients are just a few taps away through the delivery service you already use.
The grocery list is yours. The flavor story is ours.
We handle the flavor and the guidance. You decide how the rest comes together.
— Chef's Parcel
How it works
From recipe to table, thoughtfully
Curated parcels paired with guided recipes and a cooking app — so you can focus on the food, not the logistics.
-
Discover a recipe
Browse chef-designed recipes in the app.
-
Receive your parcel
Your curated parcel arrives — chef-designed spice blends, pre-measured.
-
Cook with the app
Step-by-step guidance, timers, and spice notes.
-
Keep exploring
New flavors every month. Never cook the same meal twice.

A world of flavor
Meet the chefStart with the Signature parcel
Our core collection. Bold flavors, elevated staples, and the essence of the Chef’s Parcel experience.
Explore the product details before you order.
You bring the ingredients. We bring the flavor.
Signature Chef’s Parcel
The Chef's Parcel app
A guided cooking experience in your pocket
Cook without second-guessing. Step-by-step guidance, built-in timers, and spice notes — so you can focus on the food, not the instructions.
Built-in timers
Start a timer when you are ready to cook.
Step-by-step guidance
One step at a time — calm, clear, and focused.
Spice notes
What each spice does and why it's in your parcel.

Cook. Listen. Gather.
Your next good night starts here.
Five parcel pairings. A whole cookbook beyond them. Explore a recipe, put on its playlist, and make the evening yours.
Our Boxes
Our pilot five, paired with recipes to inspire your table.
Peri Peri Chicken

Peri peri chicken is bold cooking done right. Spice, acid, and smoke balanced over a whole spatchcocked bird. The marinade does most of the work, building deep flavor overnight before the oven finishes it with caramelized edges. It's the kind of dish that fills the kitchen with something unmistakable and delivers a restaurant-style result with straightforward technique. Expect heat you can control, skin that crisps beautifully, and meat that stays juicy through to the bone.
Brass, smoke and a full table
Bright trumpet lines and rolling rhythms carry the anticipation from the marinade to a generous shared feast.
♫ Hugh Masekela Essentials — listen on Apple Music ↗Ingredients
- 4 lbs / 1.8 kg Whole chicken, spatchcocked
- 6 cloves / 25g Garlic
- 3, adjust to taste Red chilies
- 1½ tsp / 6g Smoked paprika
- ½ cup / 120 ml Olive oil
- ¼ cup / 60 ml Lemon juice
- 2 tbsp / 30 ml Red wine vinegar
- 2 tsp / 10g Salt
- ½ tsp / 3g Black pepper
Method
- Spatchcock the chicken by placing it breast-side down on a cutting board. Using sharp kitchen scissors or a sturdy knife, cut along both sides of the backbone from tail to neck and remove it entirely. Flip the chicken breast-side up and press firmly down on the breastbone with both hands until you hear a crack and the bird lies flat. Spatchcocking opens the chicken so it cooks evenly across the whole bird without a thick backbone trapping heat unevenly in the middle.
- Peri Peri Sauce: Combine the garlic, chilies, smoked paprika, olive oil, lemon juice, red wine vinegar, salt, and pepper in a blender and process until completely smooth. Taste before using. This is the moment to dial the heat up or down by adjusting the number of chilies. The marinade should taste bold and slightly sharp, knowing the oven will mellow and deepen it.
- Pat the chicken completely dry with paper towels before adding any marinade. Moisture on the skin is the enemy of caramelization. A dry surface means the marinade clings rather than slides off, and the skin will crisp instead of steam during roasting.
- Use your fingers to gently separate the skin from the breast and thigh without tearing it, then push marinade underneath so it sits directly against the meat. Coat the outside thoroughly too. This two-sided application means flavor penetrates from both directions during the cook.
- Place the chicken in a tray or zip-lock bag, cover tightly, and refrigerate for at least 6 hours. Overnight is strongly preferred. The acid in the lemon juice and vinegar begins breaking down the surface of the meat, allowing the oil and spices to travel deeper and build layered flavor you simply can't achieve with a shorter rest.
- Roast the chicken at 400°F (200°C) for 35–45 minutes, basting once halfway through with the pan juices. You're looking for golden, slightly darkened skin and juices that run clear from the thickest part of the thigh. The chicken is done when the internal temperature reaches 165°F (74°C) at the thickest point. The baste adds another layer of gloss and keeps the surface from drying out.
- Finish under the broiler for 3–5 minutes to get charred, caramelized edges on the skin. Watch it closely. The sugars in the marinade catch fast. Pull it the moment the edges go deep golden and slightly blackened in spots; that char is where the flavor concentrates.
- Rest the chicken on a board for at least 10 minutes before cutting. Resting allows the juices to redistribute through the meat. Cut too early and they run out onto the board. The bird will still be hot, just more even and juicy throughout.
Lamb Skewers

Lamb skewers are one of the oldest ways to cook meat over fire, and that simplicity is precisely the point. The lamb needs almost nothing beyond salt, oil, and heat. The fat in the meat does the rest, basting itself as it cooks and rendering into something rich and slightly smoky. The key is high heat and a confident hand: sear fast, rest briefly, and let the quality of the ingredient speak. This is cooking without distraction.
An evening by the fire
Patient guitar patterns suit turning skewers over heat, then lingering at the table after the last batch.
♫ Ali Farka Touré Essentials — listen on Apple Music ↗Ingredients
- 1.3 lbs / 600g, cubed Lamb
- 2 tbsp / 30 ml Olive oil
- 1 tsp / 5g Smoked paprika
- 1 tsp / 5g Cumin
- 1 tsp / 5g Garlic powder
- 1½ tsp / 8g Salt
- ½ tsp / 3g Black pepper
Method
- Cut the lamb into even pieces and toss with olive oil, salt, black pepper, garlic powder, cumin, and smoked paprika. Coat every surface thoroughly and let the lamb sit at room temperature for 15–20 minutes before cooking. Cold meat hitting a hot grill lowers the surface temperature and delays the sear. The cumin and smoked paprika build a warm, earthy crust that caramelizes beautifully over direct heat.
- Thread the pieces onto skewers, leaving a small gap between each one. Tight-packed skewers prevent even heat penetration and the pieces in the middle end up steaming. The slight spacing means each surface gets direct contact with the grill and develops a proper crust.
- Grill over high, direct heat for 3–4 minutes per side. Don't move the skewers around. Let them sit long enough to develop a crust before turning. Lamb at this size cooks quickly; you're looking for caramelized exterior with the centre still slightly pink and juicy.
- Transfer to a warm plate and rest for 3–4 minutes before serving. Resting allows the juices that rushed to the centre during cooking to redistribute back through the meat. Skipping this step means those juices run out the moment you cut or bite in.
Cuban Mojo Chicken
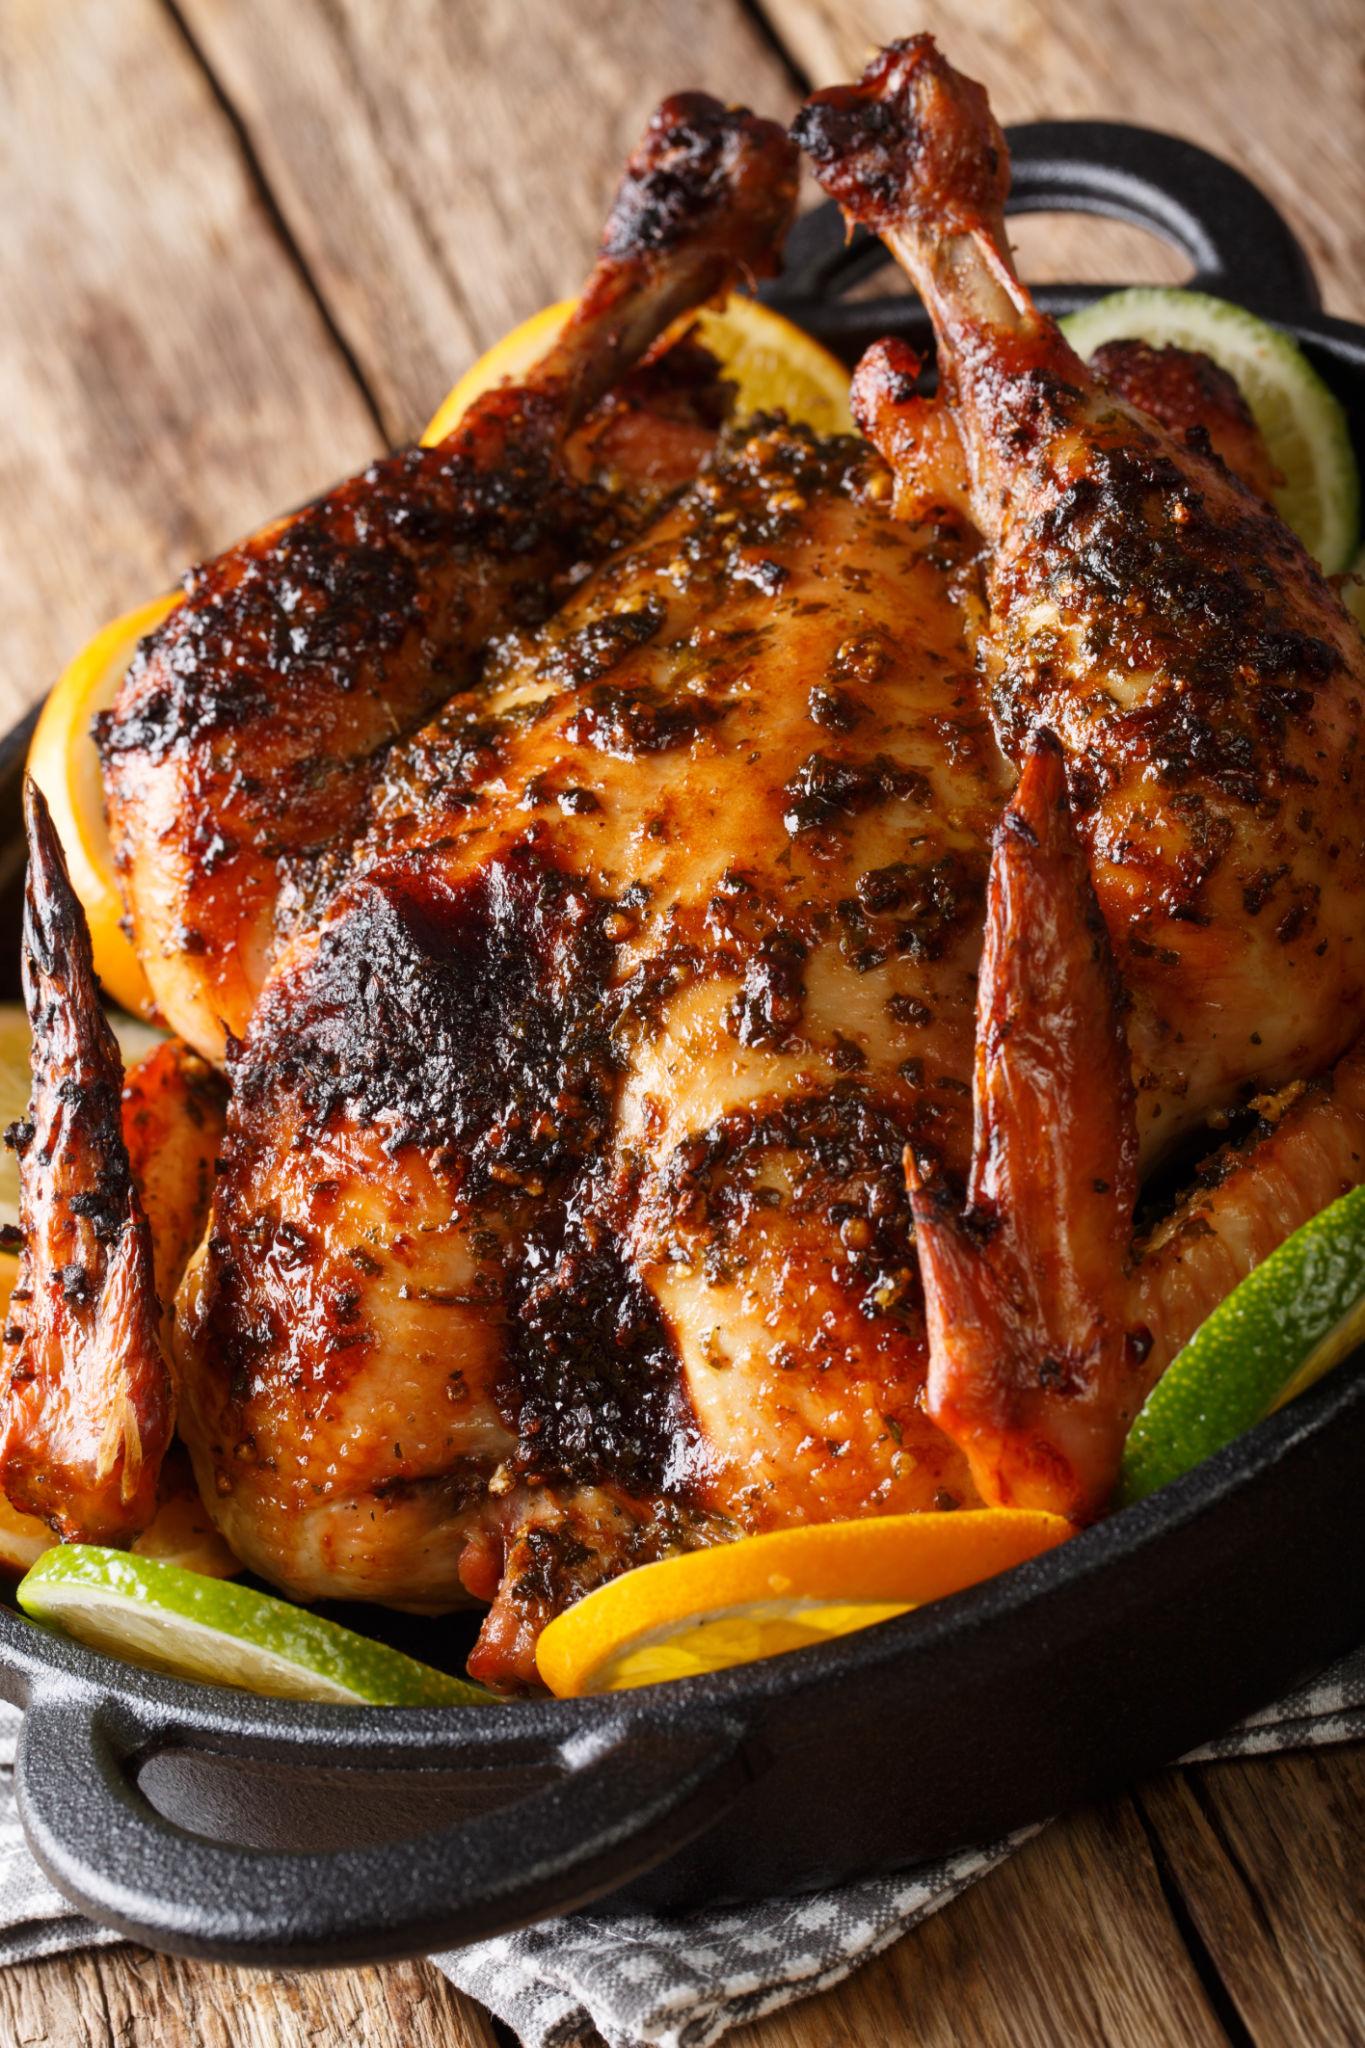
Cuban mojo marinade is built on citrus and garlic, a bright, aromatic blend that penetrates deeply overnight and roasts into something caramelized and intensely savory. The combination of sour orange (or lemon and lime mixed) with cumin and garlic is distinctly Cuban: clean and fragrant without any heat, just layered flavor that builds from the outside of the chicken inward. This is a dish that finishes bright, with edges that caramelize deeply and meat that stays juicy under a glossy, lightly charred exterior.
Citrus and a shared table
Son rhythms and conversational vocals make a natural companion to mojo’s bright citrus and an evening of passing plates.
♫ Buena Vista Social Club Essentials — listen on Apple Music ↗Ingredients
- 2.2 lbs / 1 kg Chicken thighs
- 1 cup / 240 ml, fresh Orange juice
- ¼ cup / 60 ml Lime juice
- 6 cloves / 30g Garlic
- 1 tsp / 5g Cumin
- ½ tsp / 3g Oregano
- ¼ cup / 60 ml Olive oil
- 1½ tsp / 8g Salt
- ½ tsp / 3g Paprika
- ½ medium, thinly sliced Onion
Method
- Combine the garlic, citrus juice (a mix of orange, lime, and lemon gets close to authentic sour orange), cumin, paprika, oregano, olive oil, salt, and a pinch of pepper in a blender or using a mortar and pestle. Blend until smooth and fragrant. Taste the marinade: it should be bright, garlicky, and slightly sharp, with the citrus dominating.
- Pour the marinade over the chicken pieces and turn to coat thoroughly, working it under the skin where possible. Add the thinly sliced onion and toss to coat alongside the chicken. Cover and refrigerate overnight or for a minimum of 6 hours. The citrus acid begins to break down the surface proteins, allowing the garlic and spices to travel deeper into the meat.
- Arrange the chicken and onion slices in a roasting tray and roast at 400°F (200°C) for 35–40 minutes, depending on the size of the pieces. The skin and onions should develop a deep golden, caramelized exterior as the marinade's natural sugars concentrate and char slightly. Check the thickest piece: the chicken should reach 165°F (74°C), and the juices should run completely clear.
- Spoon the pan juices over the chicken just before serving to add a final gloss and bring back any moisture that cooked off the surface. Finish with a squeeze of fresh lime. The best accompaniment is white rice and black beans, which absorb the citrusy pan juices beautifully.
Lemon Herb Chicken
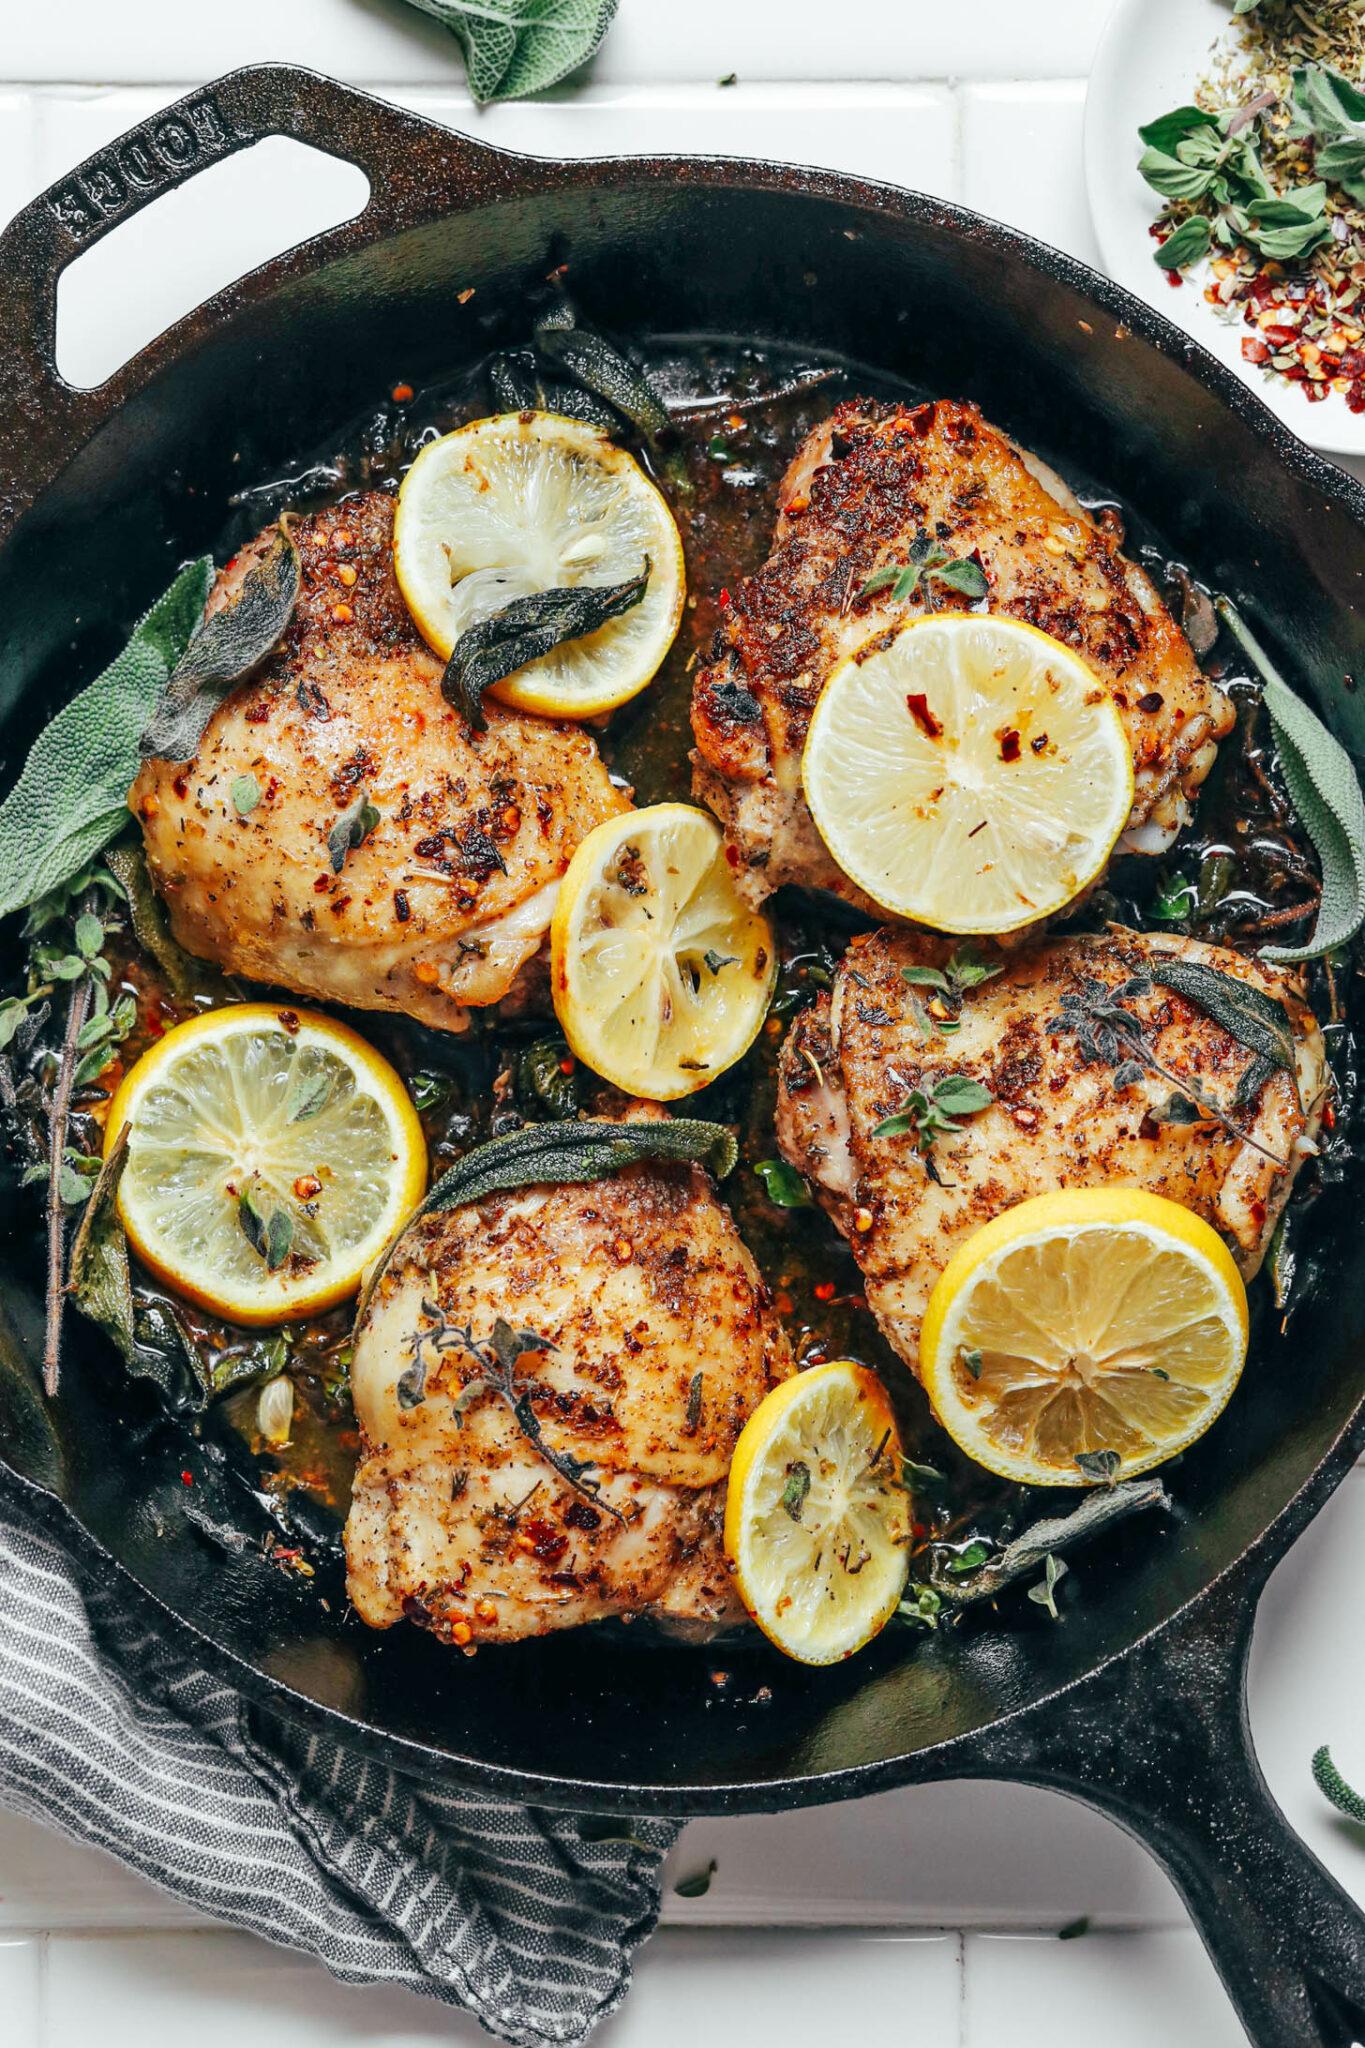
Lemon herb chicken is clean, bright cooking. The kind of dish that doesn't try to do too much and is better for it. The lemon and herbs lift the natural flavor of the chicken without masking it, and a few hours in the marinade lets the acid tenderize and season the meat through. The result is juicy, fragrant, and deeply savory without any heaviness. This works equally well on a grill or in the oven, and it's one of those recipes you come back to again and again because it never disappoints.
Lemon, herbs and an easy evening
Loose acoustic strumming suits bright flavors and a relaxed meal that does not need a special occasion.
♫ Jack Johnson Essentials — listen on Apple Music ↗Ingredients
- 4, about 1.7 lbs / 800g Chicken thighs
- 3 tbsp / 45 ml Olive oil
- 4 cloves / 20g, minced Garlic
- from 2 lemons Lemon zest
- from 2 lemons, about ¼ cup / 60 ml Lemon juice
- 1 tsp / 6g Salt
- 1 tsp / 5g Black pepper
- 1 tsp / 5g Paprika
- 1 tbsp, chopped Fresh parsley
- 1 tsp / 2g Dried oregano or thyme
- 1 tbsp / 14g, for finishing Butter
Method
- In a bowl, whisk together the olive oil, minced garlic, lemon zest, lemon juice, paprika, chopped parsley, oregano or thyme, salt, and black pepper to make the marinade. Taste it — it should be bright, garlicky, and slightly sharp. It will mellow considerably during cooking.
- Add the chicken thighs and turn to coat thoroughly. Cover and refrigerate for 2–4 hours. Long enough for the acid to tenderize the surface and the flavors to penetrate, but not so long that the texture becomes mushy. Pull the chicken out 15 minutes before cooking so it's not stone cold going onto the grill or into the oven.
- For grilling: cook over medium-high heat, turning every 4–5 minutes to build even color. For roasting: place in a preheated oven at 400°F (200°C) on a rack or in a shallow tray. Either way, the internal temperature needs to reach 165°F (74°C) at the thickest point.
- In the last 2 minutes of cooking, add the butter to the pan or brush it over the chicken and let it melt into the surface. This adds richness and a final gloss. Rest the chicken for 5 minutes before serving. Finish with a squeeze of fresh lemon.
Garlic Butter Steak
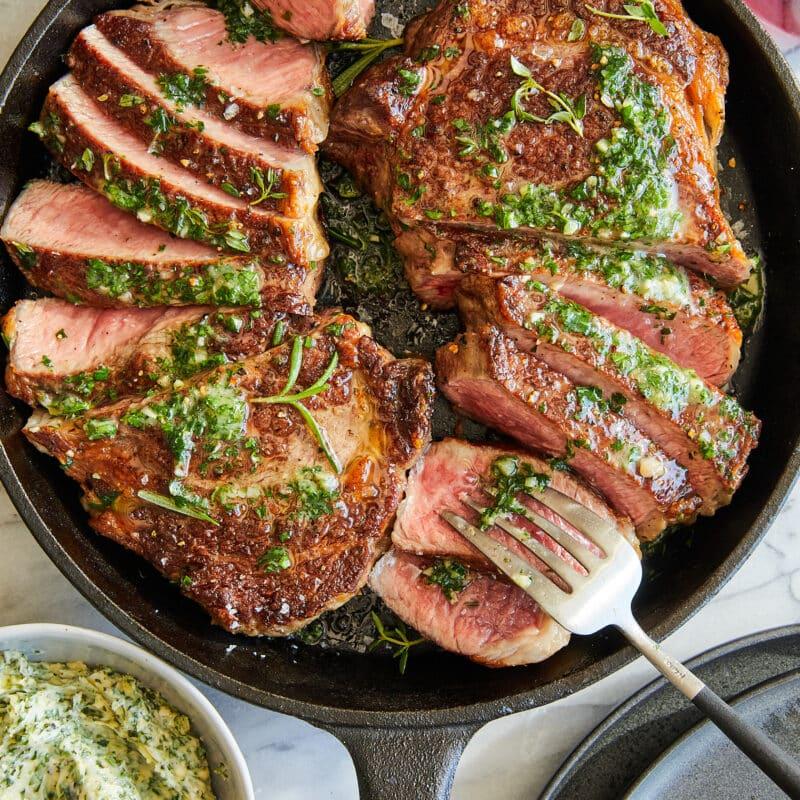
A garlic butter steak doesn't need much. What it needs is done properly. The quality of the steak itself matters more here than in almost any other recipe. Good marbling in the ribeye is the difference between good and exceptional, and it is worth sourcing from a quality butcher. If you are in Los Angeles, source from a butcher you trust; good marbling is the difference between good and exceptional here. High heat for the sear, butter and aromatics for the baste, and enough restraint to let the steak rest before cutting. The basting step is where this dish separates itself from simply pan-frying: the butter foams and the garlic infuses it, and you spoon it over the steak continuously as it finishes, building a glossy, aromatic crust that goes all the way to the edge. Rest it, slice it thickly, and the result is deeply savory and restaurant-quality.
Your own supper club
Piano-led jazz makes basting, resting and plating the steak feel like preparing a special table for two.
♫ Piano Bar — listen on Apple Music ↗Ingredients
- 20 oz / 600g, two steaks Ribeye steak
- 6 tbsp / 80g Butter
- 4 cloves / 20g, crushed Garlic
- 2 tsp / 12g, or to taste Flaky salt
- 1 tsp / 6g, cracked Black pepper
- 4 sprigs Fresh thyme
Method
- Pull the steak from the fridge 20–30 minutes before cooking and pat it completely dry with paper towels. A dry surface sears instead of steaming, and room-temperature meat cooks more evenly. Season generously on both sides with flaky salt and cracked black pepper, pressing it in so it adheres.
- Use two heavy-based pans, or cook one steak at a time in batches without crowding. Divide the butter, garlic and thyme between the steaks. Allow extra time for a second batch; use the same per-steak cooking times. Heat the pan over high heat until hot. Add a high smoke-point oil, not butter, which burns at this temperature, and lay the steak in away from you. Press it flat for 2–3 seconds so the full surface makes contact with the pan. Sear for 3–4 minutes per side without moving it, building a deep, dark crust.
- Reduce the heat to medium and add the butter, crushed garlic cloves, and fresh thyme sprigs. As the butter foams, tilt the pan toward you and spoon the butter over the steak continuously for 1–2 minutes. The garlic and thyme infuse the butter with each pass; this is the baste that finishes the crust and adds the layered flavor.
- Transfer the steak to a warm board and rest for 5–7 minutes. The centre will continue cooking slightly from residual heat, and the juices will redistribute so the steak stays moist when sliced. Slice against the grain for maximum tenderness and spoon any resting juices over the top.
Recipe Inspiration
36 more ways to cook. No box required — just your ingredients and a little curiosity.
Peri Peri Prawn Skewers

Peri peri prawn skewers are fast, high-heat cooking at its most satisfying. A short marinade, a few minutes over fire, and the result is something bright, spiced, and deeply charred at the edges. The key is respecting the prawn: it cooks quickly, and knowing when to pull it off is the whole skill. This is a dish that works equally well as a starter or a centrepiece, with a clean, punchy flavor that doesn't need anything complicated around it.
Skewers at golden hour
An easy bossa pulse leaves room for conversation while the prawns cook quickly and everyone settles outside.
♫ Bossa Nova Essentials — listen on Apple Music ↗Ingredients
- 1 lb / 500g, peeled & deveined Prawns
- ⅓ cup / 90 ml, homemade or store-bought Peri peri sauce
- 2 tbsp / 30 ml Olive oil
- 2 cloves / 10g, grated Garlic
- 1 tsp Lemon zest
Method
- For the peri peri sauce: if making from scratch, blend 3 red chilies, 4 garlic cloves, 1½ tsp smoked paprika, ½ cup olive oil, ¼ cup lemon juice, 2 tbsp red wine vinegar, and 2 tsp salt until completely smooth. Alternatively, use a quality store-bought peri peri sauce. Add the peeled, deveined prawns to a bowl with the sauce, olive oil, grated garlic, and lemon zest. Toss until every prawn is evenly coated. The garlic should be grated finely so it sticks rather than clumping. Don’t add extra salt yet; the peri sauce carries it.
- Set the prawns aside to marinate while you prepare and heat the grill — keep it brief. The acid in the sauce begins breaking down the texture of the protein quickly; push it much longer and the outside turns slightly mushy before it even hits the heat. This is one recipe where less marination time is genuinely better.
- Thread the prawns onto skewers with a small gap between each one. Spacing matters: crowded skewers trap steam and the prawns will stew rather than char. Thread through both the tail and the thicker body section so each prawn stays flat against the grill and cooks evenly.
- Grill over high heat for 2–3 minutes per side. You want a hot, clean grill. If it isn't ripping hot before the skewers go on, you'll get steaming instead of searing. The skin should pick up dark grill marks quickly; that char carries the smoky depth that makes these work.
- Pull the skewers off the moment the prawns are fully opaque and the flesh has just lost its translucency. Watch the shape: a relaxed C-curve means they're perfectly cooked; a tight, closed curl means they've gone a minute too long and will be rubbery. Serve immediately.
Brioche Buns
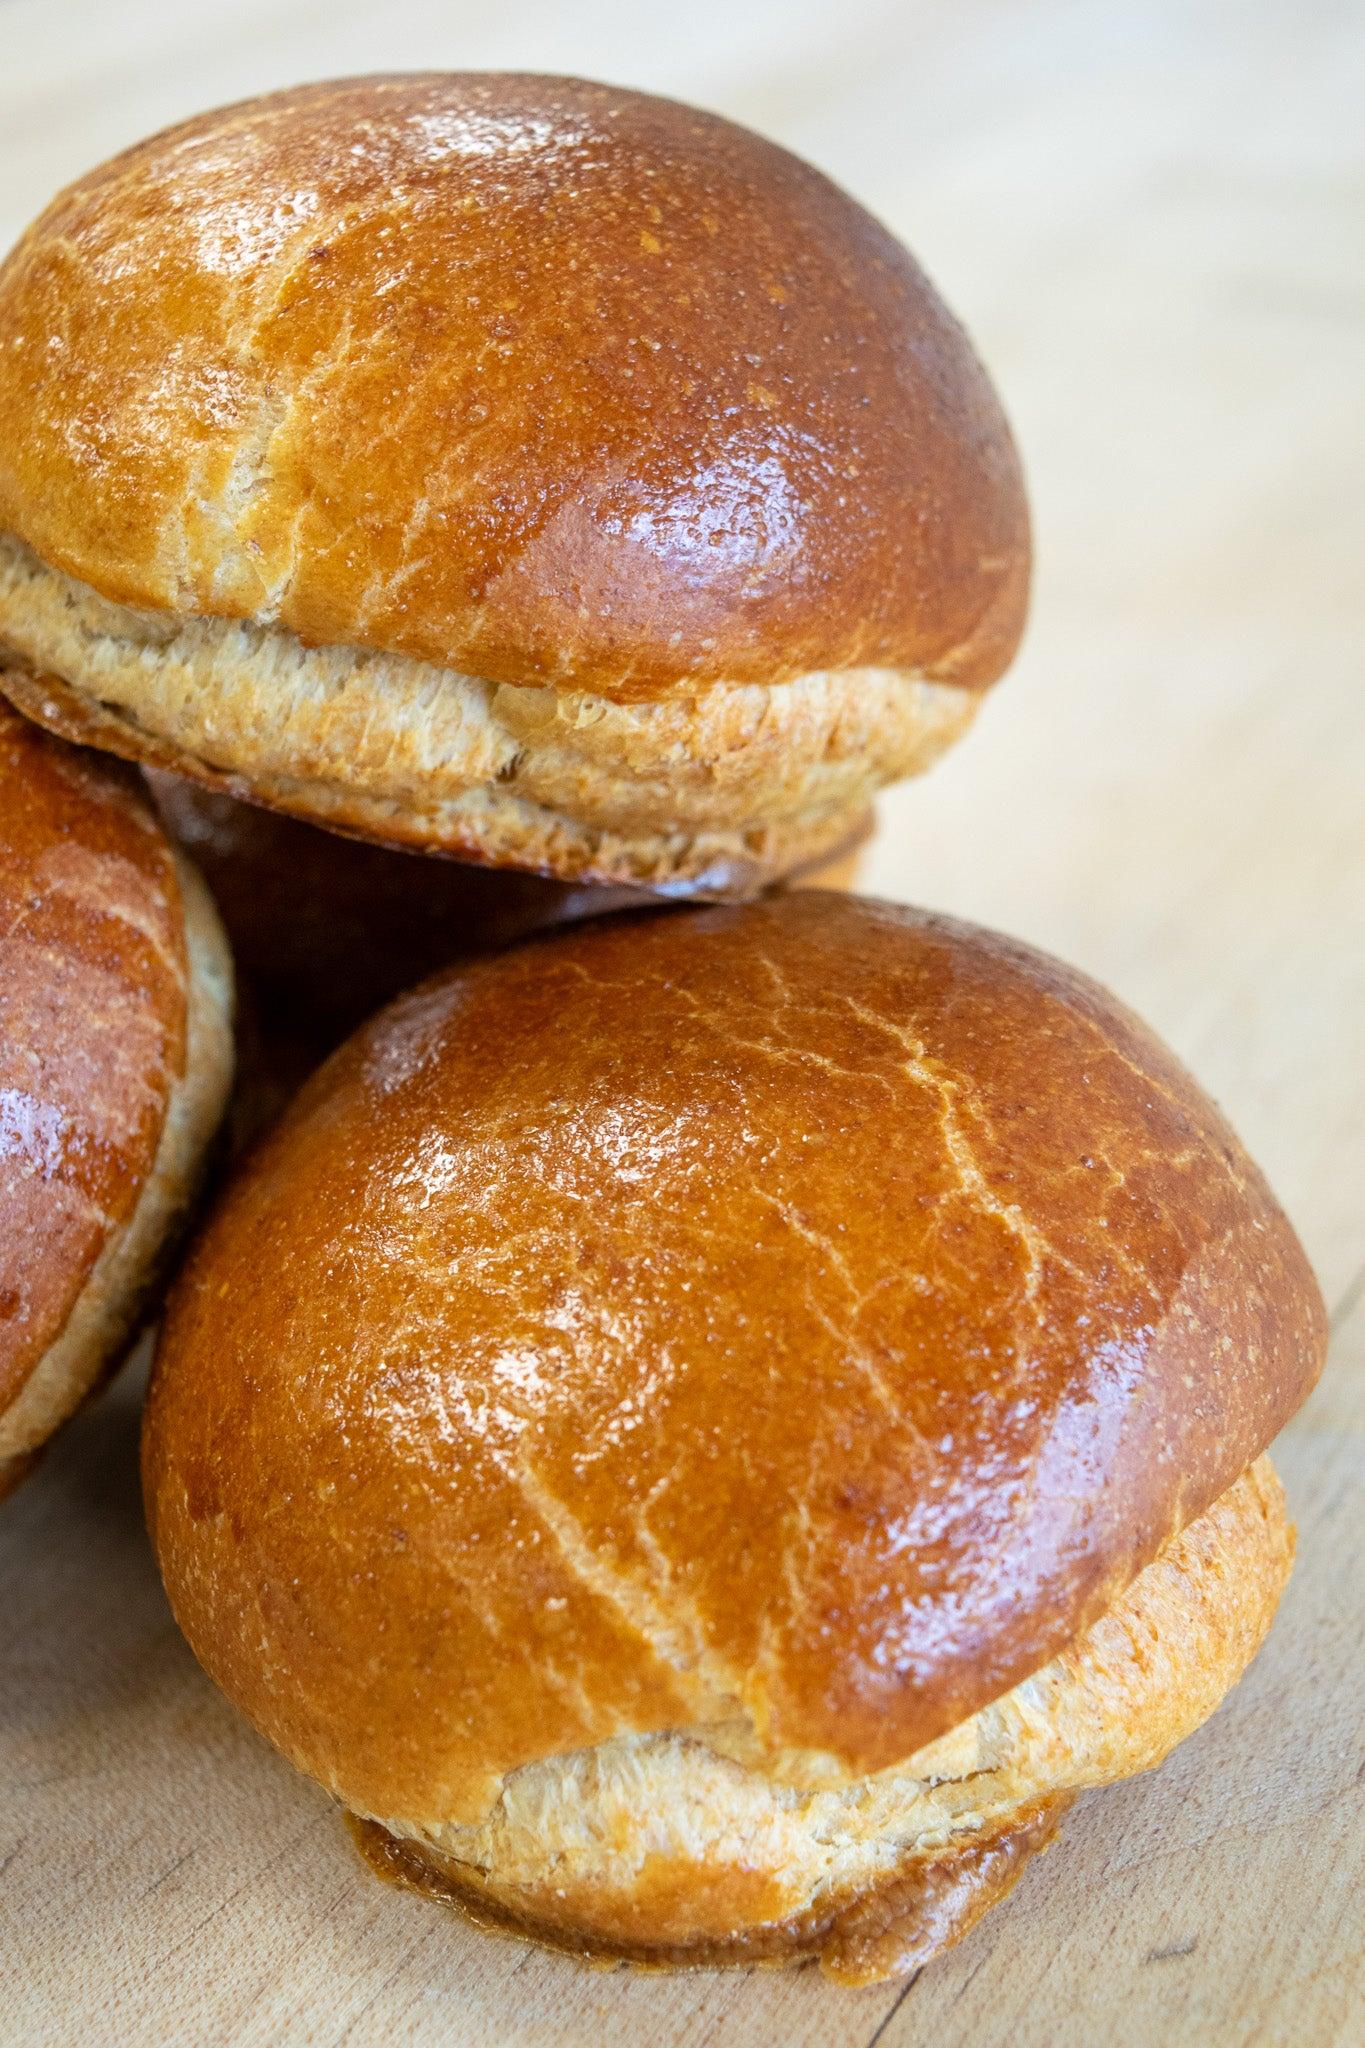
Brioche sits at the intersection of bread and pastry. Rich with eggs and butter, but still light enough to pull apart in soft layers. The dough needs time and patience to come together properly, and the butter goes in gradually so it fully incorporates without breaking the structure. The result is a bun with a golden crust, a delicate crumb, and a slight richness that makes everything it holds taste better. This is a recipe worth making from scratch.
A bakery morning
Expressive French café songs turn kneading and brushing buttery buns into a small weekend ritual.
♫ Edith Piaf Essentials — listen on Apple Music ↗Ingredients
- 3 cups / 375g Flour
- 3 Eggs
- ½ cup / 115g, softened Butter
- ¼ cup / 50g Sugar
- 2¼ tsp / 7g Yeast
- ½ cup / 120 ml Milk
- 1 tsp / 6g Salt
Method
- Warm the milk until it's just above body temperature. About 38°C / 100°F, comfortable on your wrist. Then dissolve in the sugar and sprinkle over the yeast. Leave it undisturbed for 5–10 minutes. You're looking for a foamy, slightly domed surface; if nothing happens after 10 minutes, the yeast is likely old or the milk was too hot and killed it.
- Combine the flour and salt in a large bowl, then add the eggs and the yeast mixture. Mix until a rough, shaggy dough comes together. It will look messy at this stage and that's fine. Avoid the temptation to add more flour; the dough will become smooth as you work it.
- Knead the dough firmly for about 5 minutes until it starts to come together into something more cohesive. It will still feel slightly sticky, but should hold its shape when pressed. This initial knead builds the gluten network that will eventually hold all that butter.
- Add the softened butter a small piece at a time, kneading each addition fully into the dough before adding the next. This process takes 10–12 minutes and feels like work. The dough may look like it's falling apart as the fat goes in, but keep going. You're done when the dough is smooth, elastic, and pulls cleanly away from your hands.
- Place the dough in a lightly oiled bowl, cover with a damp cloth, and leave to rise at room temperature for 1–2 hours until roughly doubled in size. The speed of the rise depends on how warm your kitchen is. A cool room means slower, better flavor development.
- Divide the dough into equal portions and shape each one into a tight ball by tucking the edges underneath and rolling against the work surface with a cupped hand. Arrange on a lined tray with a few centimetres of space between each bun, then proof for another 45 minutes until puffed and pillowy. Brush gently with egg wash before baking.
- Bake at 180°C / 350°F for 18–20 minutes until deep golden brown all over. The tops should be rich amber. Pale buns haven't developed enough Maillard browning and will taste underdone. Cool on a wire rack for at least 10 minutes before splitting.
Crispy Chicken Sandwich

A great crispy chicken sandwich is about architecture as much as flavor. The ratio of crunch to soft, the acid cutting through the richness, and a coating that stays crisp long enough to eat. The buttermilk overnight soak does two things: it tenderizes the meat and seasons it all the way through. The cornstarch in the dredge creates that craggly, shatteringly crisp crust that holds up even with sauce added. Get the technique right and this is a restaurant-style result at home.
The countertop diner
Crisp organ riffs and spare instrumental grooves give breading, frying and stacking a satisfying rhythm.
♫ Booker T & The MG's Essentials — listen on Apple Music ↗Ingredients
- 1.3 lbs / 600g Chicken thighs
- 1 cup / 240 ml Buttermilk
- 1½ tsp / 8g Salt
- 1 tsp / 5g Black pepper
- 1 tsp / 5g Onion powder
- 1½ cups / 200g Flour
- ½ cup / 60g Cornstarch
- 1 tsp / 5g Paprika
- 1 tsp / 5g Garlic powder
- for frying Oil
Method
- Season the raw chicken pieces directly with 1½ teaspoons salt, 1 teaspoon black pepper, 1 teaspoon onion powder, and 1 teaspoon garlic powder. Toss to coat, then submerge fully in buttermilk, cover, and refrigerate overnight or for at least 4 hours. The lactic acid in the buttermilk gently breaks down muscle fibres, making the meat more tender after cooking. Seasoning before the soak means the spices penetrate through the meat rather than sitting only on the surface.
- In a wide, shallow bowl, whisk together the flour, cornstarch, paprika, garlic powder, onion powder, remaining salt, and black pepper. The cornstarch is not optional: it reduces gluten formation in the coating and produces a lighter, crispier crust than flour alone. Aim for roughly a 3:1 ratio of flour to cornstarch.
- Lift each piece of chicken from the buttermilk, letting the excess drip off, then dredge firmly in the flour mixture. Press the coating into the surface rather than just dusting it on. Set the dredged pieces on a rack and let them rest for 10 minutes. This rest allows the coating to hydrate slightly and adhere properly, reducing the chance it separates during frying.
- Fry in oil held at a steady 175°C / 350°F. Use a thermometer if you have one. The oil temperature drops when the chicken goes in, so don't overcrowd the pan; fry in batches. Cook until the coating is deep golden and the internal temperature reads 74°C / 165°F, about 12–15 minutes depending on thickness.
- Transfer to a wire rack, not paper towels, and rest for 2–3 minutes before assembling. The rack keeps air circulating underneath and the crust stays crisp; paper towels trap steam and soften it. Assemble the sandwich immediately: toasted bun, sauce, slaw, chicken. Serve right away.
Explore all 36 inspiration recipes
Chakalaka

Chakalaka is South African township cooking at its most vibrant, a spiced bean and vegetable relish that can anchor a plate or round out a braai spread. Every family makes it slightly differently, and that flexibility is part of its character. The curry powder is the foundation, toasted briefly in the pan to bloom before the liquid comes in, building a layered warmth that deepens the longer it simmers. This version is bold and direct, meant to stand up to grilled meat and hold its own.
A pot worth gathering around
Makeba’s vivid voice keeps the kitchen lively as colorful vegetables soften into a relish made for sharing.
♫ Miriam Makeba Essentials — listen on Apple Music ↗Ingredients
- 1 medium / 150g, diced Red bell pepper
- 2 tbsp / 30 ml Oil
- 2 tbsp / 12g Curry powder
- 1 tsp / 5g Paprika
- 1½–3g / ½–1 tsp, adjust to taste Cayenne pepper
- 1 tsp / 2g Thyme, dried
- to taste Salt and black pepper
- 14 oz / 400g, 1 can Diced tomatoes
- 2 tbsp / 30g Tomato paste
- 1 can / 400g, or 1½ cups cooked beans Baked beans
- ½ cup / 120 ml Water or stock
- 1 tsp / 5g Sugar
Method
- Heat the oil in a wide, deep pan over medium heat. Add the diced red bell pepper and cook for 4–5 minutes, stirring occasionally, until it softens and begins to brighten in color. The pepper forms the sweet, slightly charred base of the whole dish.
- Push the pepper to the side and add the curry powder, paprika, cayenne, and thyme directly to the cleared space in the pan. Let the spices cook for 30–45 seconds, stirring constantly, until they smell fragrant and slightly toasty. This step blooms the spices and removes the raw, powdery taste. It makes a noticeable difference to the finished dish.
- Add the diced tomatoes and tomato paste, stirring everything together to combine. Bring to a steady simmer and cook for 5 minutes, letting the tomatoes break down slightly and the paste deepen the sauce.
- Add the baked beans and water or stock, then stir to combine. Season with salt and black pepper. Reduce the heat to low-medium and simmer uncovered for 15–20 minutes, stirring occasionally, until the sauce thickens and the flavors settle together.
- Stir in the sugar to balance the acidity from the tomatoes. Taste and adjust: more salt to bring it forward, more cayenne for heat, a squeeze of lemon for brightness. Chakalaka improves with time. Made a day ahead and reheated gently, it is noticeably better.
Peri Peri Honey Wings
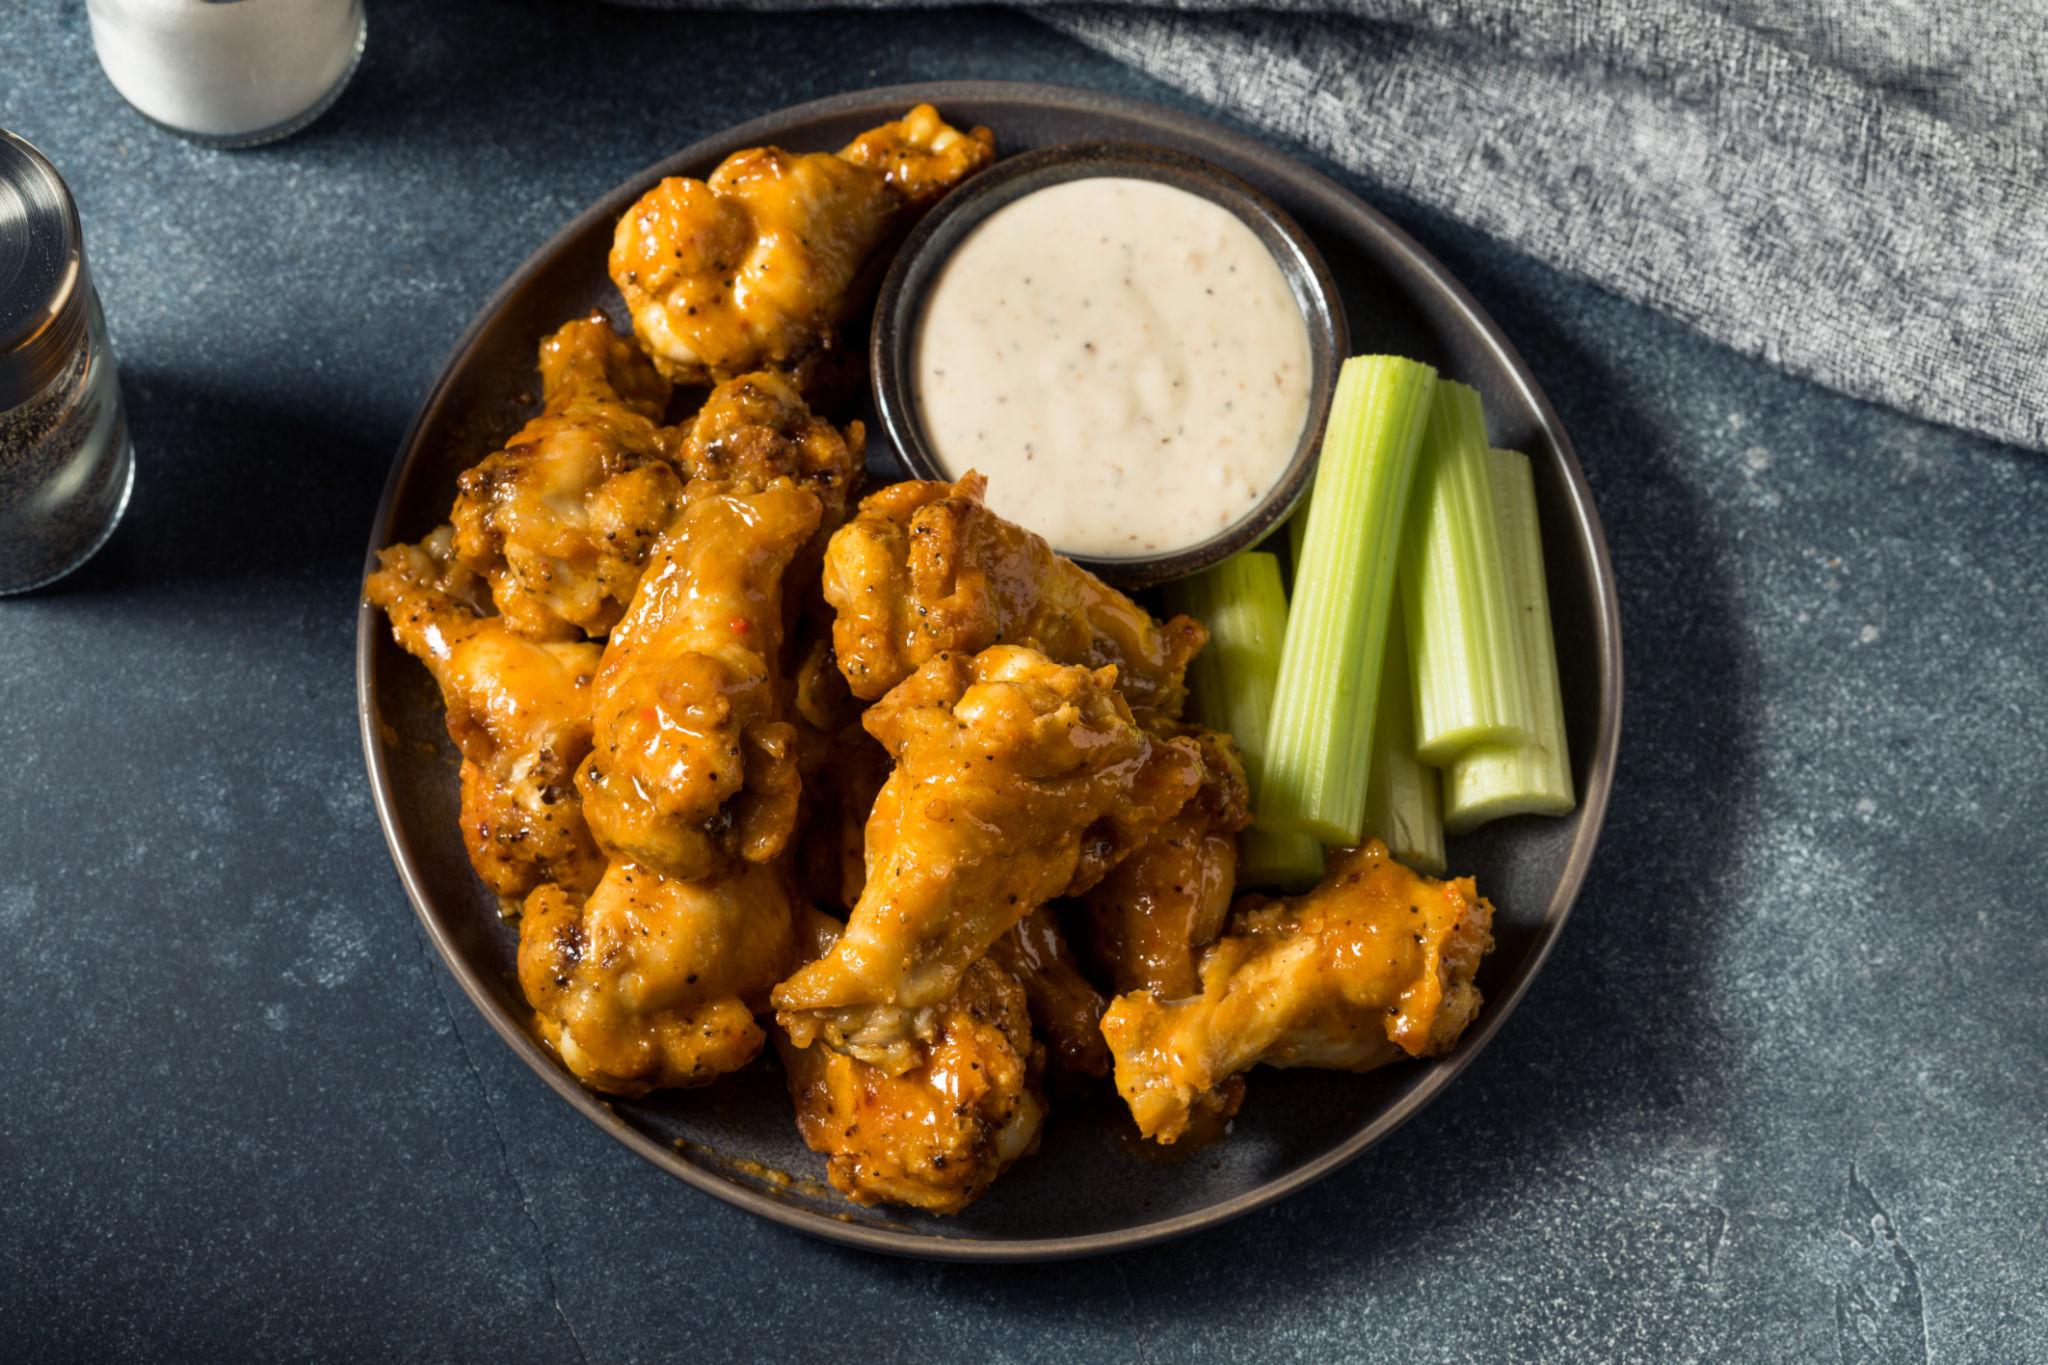
These wings land in that perfect zone where heat and sweetness keep pulling you back for one more. The peri peri sauce builds a slow, layered heat while the honey rounds and caramelizes it into a glaze that clings. The key is getting the wings genuinely crisp before the sauce goes on. Soft wings with sauce is just wet. Roast them hot and long enough that the skin is crackling, then toss them in the warm glaze at the last moment so everything stays sharp and glossy.
Sticky fingers, good company
Buoyant horns and dance-floor warmth make these honey-glazed wings feel like the start of a kitchen party.
♫ Earth, Wind & Fire Essentials — listen on Apple Music ↗Ingredients
- 2.2 lbs / 1 kg Chicken wings
- 1½ tsp / 8g Salt
- 1 tsp / 5g Garlic powder
- ½ tsp / 3g Black pepper
- ½ cup / 120 ml Peri peri sauce
- ⅓ cup / 80 ml Honey
- 2 tbsp / 30g Butter
Method
- Make or prepare the peri peri sauce: to make it from scratch, blend 3 red chilies, 4 garlic cloves, 1½ tsp smoked paprika, ½ cup olive oil, ¼ cup lemon juice, 2 tbsp red wine vinegar, and 2 tsp salt until completely smooth. Alternatively, use a quality store-bought peri peri sauce. Measure out ½ cup for this recipe and set aside.
- Pat the wings completely and thoroughly dry with paper towels before seasoning. Surface moisture is what prevents crisping. Steam forms between the skin and the hot air, and you get soft instead of crisp. If you have time, leave them uncovered in the fridge for an hour before cooking to dry out further.
- Season generously with salt, garlic powder, and black pepper. Toss to coat evenly and spread on a wire rack set over a baking tray in a single layer. The rack lifts the wings off the tray so hot air circulates underneath. This is a key part of getting even crispness without flipping constantly.
- Roast at 220°C / 425°F for 35–40 minutes, flipping once at the halfway point so both sides develop color. The wings are ready when the skin is deeply golden, visibly tightened, and pulls away from the bone slightly at the tips — and the internal temperature reads 165°F (74°C). They should look almost done before the sauce goes on.
- While the wings finish roasting, melt the butter in a small saucepan over medium-low heat and add the peri peri sauce and honey. Stir gently and simmer for about 2 minutes until the glaze thickens slightly and looks glossy. Don't reduce it too hard. You want it pourable, not caramel-thick.
- Toss the hot wings in the warm glaze immediately after pulling them from the oven. Work quickly and coat them evenly. The residual heat from the wings continues to set the glaze as you toss. Serve straight away while the skin is still crackling underneath the sauce.
Garlic Butter Shrimp

Garlic butter shrimp is one of the fastest dishes you can make that still tastes genuinely considered. The entire cook happens in under five minutes, which means your attention needs to be complete. There's no time to look away. Butter browns gently, garlic softens without burning, and the shrimp cook in that fragrant base until just opaque. A hit of lemon at the end cuts the richness and lifts the whole pan. The result is bright, buttery, and deeply savory, ready in the time it takes to warm a plate.
Butter meets a breeze
Airy vocals and gently swinging rhythms balance the richness of garlic butter with an open-window feeling.
♫ Sergio Mendes Essentials — listen on Apple Music ↗Ingredients
- 1 lb / 500g Shrimp
- 4 tbsp / 60g Butter
- 4 cloves / 20g, chopped Garlic
- 2 tbsp / 30 ml Lemon juice
- 1 tsp Lemon zest
- 1 tsp / 5g Salt
- small handful, roughly chopped, for garnish Fresh parsley
Method
- Place a wide skillet over medium heat and add the butter. Let it melt slowly until it stops foaming and begins to smell nutty. This is clarified, slightly browned butter, and it's more flavorful than pale melted butter. Don't rush to high heat; control here sets up the whole dish.
- Add the minced garlic and stir continuously for 30–45 seconds. You're looking for a light golden color and a fragrant, sweet aroma, not dark brown. Garlic burns fast in hot butter and turns bitter; if the pan is smoking, reduce the heat before it goes in.
- Add the shrimp in a single layer without crowding. If they're stacked or overlapping, they'll steam instead of sear. Leave them undisturbed for 1½–2 minutes per side. They're ready to flip when the edges go pink and opaque. Flip once only and cook the second side briefly.
- Add the lemon juice and zest as the shrimp finish cooking and toss the pan gently to coat. The acid lifts the brown bits off the base and brightens the butter sauce. The shrimp should be fully opaque, slightly firm to touch, and curl into a relaxed C-shape, not a tight coil. Season with salt to taste, scatter fresh parsley over the pan, and serve immediately.
Afro-Cali Corn Fritters

These corn fritters land somewhere between a side dish and a snack worth eating on their own. Crisp at the edges, tender in the middle, with a sweetness from the corn that plays against warm spice in the batter. The technique is straightforward, but the result feels considered. They're the kind of thing that disappears fast from a plate, and they work equally well with a cool yogurt dip or stacked next to grilled chicken. Make them small enough to cook through without burning the outside.
A little bounce in the kitchen
Springy offbeats and bright horns match small batches of golden fritters and the pleasure of passing them around.
♫ Classic Ska Essentials — listen on Apple Music ↗Ingredients
- 2 cups / 300g, fresh or thawed Corn kernels
- 1 cup / 120g Flour
- 2 Eggs
- ½ cup / 120 ml Milk
- 1 tsp / 5g Smoked paprika
- 1 tsp / 5g Cumin
- ½ tsp / 2g Chili flakes
- 1 tsp / 5g Salt
- for shallow frying Oil
Method
- Combine the corn kernels, flour, eggs, smoked paprika, cumin, chili flakes, and salt in a bowl. Add enough milk to bring the batter to a thick, scoopable consistency. It should hold its shape when dropped from a spoon but not be stiff. If the batter is too thin, the fritters spread flat and don’t hold together. Mix until just combined.
- Pour enough oil into a wide skillet to come about ¼ inch (about 5mm) up the sides. This is shallow frying, not deep frying. Heat over medium until a drop of batter sizzles immediately on contact. Too cool and the fritters absorb oil; too hot and they brown before cooking through.
- Drop heaped tablespoons of batter into the pan and press gently with the back of the spoon to flatten slightly. Work in batches so the pan isn't crowded. Too many fritters at once drops the temperature and you lose the crisp edge.
- Cook for 3–4 minutes on the first side without touching them, until the underside is deep golden and the edges look set. Flip once and cook the second side for another 2–3 minutes. The fritters are done when both sides are evenly golden and they feel firm when lightly pressed. Drain on a wire rack and season with a pinch of salt while hot.
Grilled Peri Peri Corn
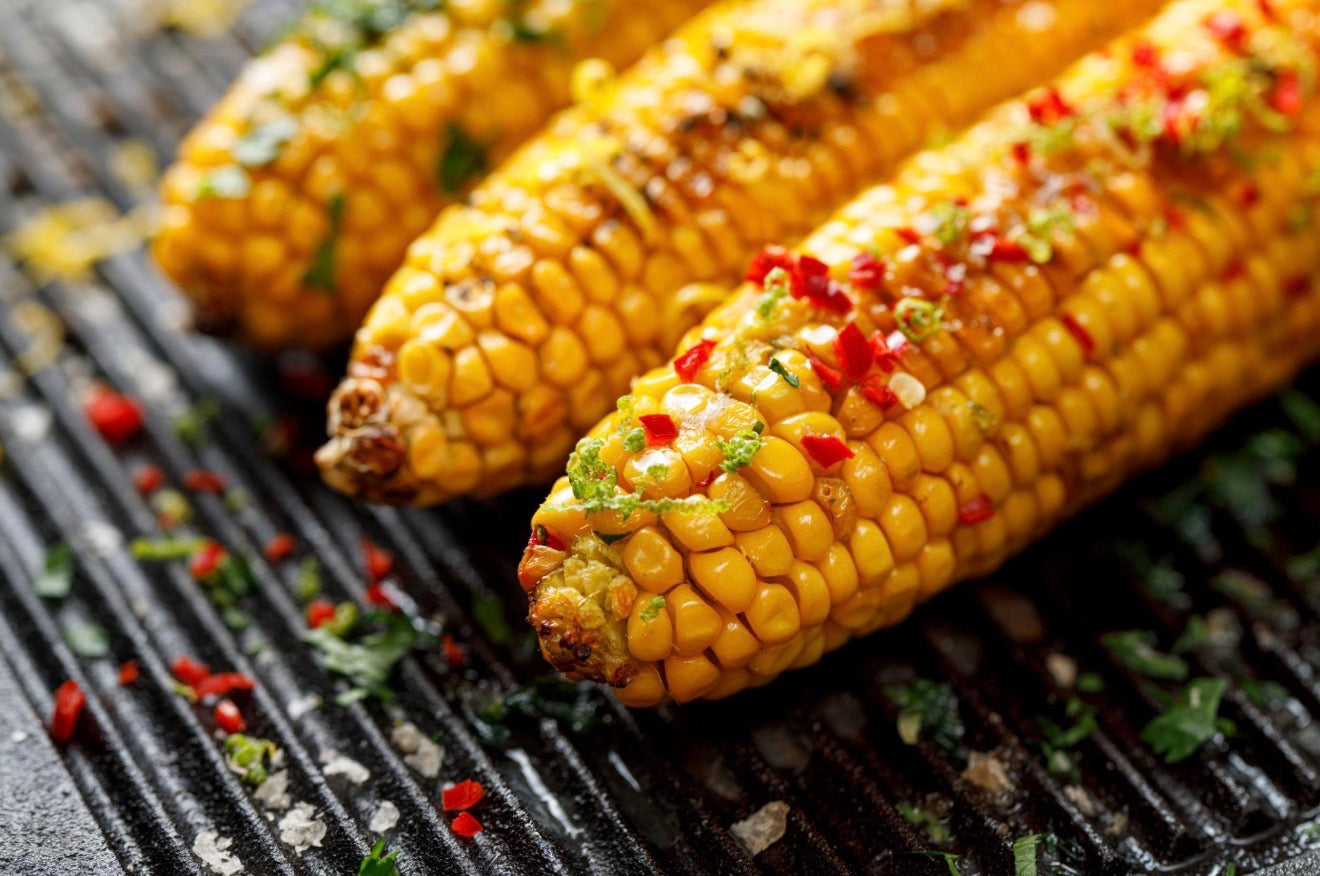
Grilled corn is one of the most satisfying things you can make on a grill, and the peri peri butter transforms it from a simple side into something with real character. The heat from the flame chars the kernels lightly, concentrating their sweetness, while the spiced butter melts into every crevice as it goes on hot. It's a dish that takes almost no time and rewards you with something that tastes far more considered than the effort involved. Serve it alongside anything grilled and it holds its own.
Corn at the cookout
Twangy guitars and rolling drums bring a beachside cookout feeling while the corn chars on the grill.
♫ Surf Essentials — listen on Apple Music ↗Ingredients
- 4 ears Corn
- ¼ cup / 60 ml Peri peri sauce
- 3 tbsp / 40g Butter
- 1, for squeezing Lemon
- pinch, for finishing Flaky salt
Method
- Place the corn cobs directly on a hot grill over medium-high heat, turning every few minutes. You're looking for a mix of deep golden and lightly charred kernels on each side. The dark spots are where the natural sugars have caramelized and that's where the flavor concentrates. This takes about 10–12 minutes total, rotating the cob a quarter-turn each time.
- While the corn grills, melt the butter in a small saucepan over low heat and stir in the peri peri sauce along with a pinch of salt. Keep it warm and loose. You want it brushable, not reduced to a thick paste. Taste it: the heat should be present but balanced with the richness of the butter.
- As soon as the corn comes off the grill, brush the peri peri butter generously over each cob while they're still steaming hot. The heat opens the kernels and draws the butter in. Apply a second coat immediately after the first absorbs. Finish with a squeeze of fresh lemon and a pinch of flaky salt.
Afro-Cali Chicken & Waffles

Chicken and waffles is a study in contrast. Crispy against pillowy, savory against sweet, heat cutting through richness. This version layers in peri peri heat through the glaze, which brings the whole dish into focus and stops it from sitting too sweet. The chicken needs to be properly crisp before it goes anywhere near the waffle, and the waffle needs to come straight off the iron. Everything should hit the plate at the same time. Get that right and this is a genuinely memorable combination.
Brunch with the windows open
Warm vocals and an easy swing make crisp chicken and waffles feel like a leisurely morning with people you love.
♫ Sam Cooke Essentials — listen on Apple Music ↗Ingredients
- 1.3 lbs / 600g Chicken thighs
- 1 cup / 240 ml Buttermilk
- 1½ cups / 200g Flour, for dredging
- ½ cup / 60g Cornstarch
- 1 tsp / 5g Paprika
- 1½ tsp / 8g Salt
- 2 cups / 250g Flour, for waffle batter
- 2 Eggs
- 1 cup / 240 ml Milk
- 4 tbsp / 60g Butter, for waffle batter
- 2 tsp / 10g Baking powder
- ½ cup / 120 ml Maple syrup
- 2 tbsp / 30g Butter, for glaze
- 1 tbsp / 15 ml Peri peri sauce
Method
- Submerge the chicken in buttermilk with a generous pinch of salt, cover, and refrigerate overnight. The buttermilk tenderizes the meat and seasons it through. Skipping or shortening this step shows in the final texture. Pull the chicken out 15 minutes before frying so it's not ice-cold going into the oil.
- Prepare the waffle batter and cook the waffles fresh, directly before serving. Never ahead of time. Waffles stored even for a few minutes steam themselves soft. Keep finished waffles on a wire rack in a warm oven at 210°F (100°C) while the chicken finishes, not stacked on a plate.
- Dredge the buttermilk-soaked chicken through a seasoned flour and cornstarch mixture, pressing the coating on firmly. Lower into oil held at 175°C / 350°F and fry for 12–15 minutes until the coating is deep golden and the internal temperature reaches 74°C / 165°F. Fry in batches to keep the oil temperature stable.
- Melt the butter in a small pan over low heat and whisk in the maple syrup and peri peri sauce. Taste the glaze. It should be sweet and warm with a clear heat on the finish. Adjust the peri peri to your preference; more sauce sharpens the heat, less keeps it gentle.
- Assemble immediately while everything is hot: waffle on the plate, chicken on top, glaze spooned over generously. The glaze should pool slightly around the base of the waffle. Serve right away. This dish doesn't wait well.
One-Pot Saffron Chicken & Rice

One-pot saffron chicken and rice is the kind of dish that smells like it took all day even though it comes together in under an hour. Saffron is one of the world's most prized spices, rare and deeply aromatic, and even a small pinch transforms the rice into something distinctly golden and floral. It steeps briefly in warm water first to unlock its color and fragrance before it enters the pot. Layered flavor builds through the sear, the aromatics, and the slow covered cook. Everything finishes together in one pan with chicken that is deeply golden and rice that is fluffy, fragrant, and stained a warm amber throughout.
Let the pot do its work
Interlocking kora lines offer something beautiful to follow while saffron rice steams quietly beneath the lid.
♫ Toumani Diabate Essentials — listen on Apple Music ↗Ingredients
- 6 pieces, about 2.5 lbs / 1.1 kg Chicken thighs, bone-in skin-on, or breasts if preferred leaner
- 1 tsp / 5g Salt
- ½ tsp / 2g Black pepper
- 1 tsp / 5g Smoked paprika
- 1 tsp / 5g Garlic powder
- 1 tbsp / 15 ml Olive oil
- 1 small / 100g Onion, small, diced
- 4 cloves / 20g, minced Garlic
- 1 medium / 150g, chopped Red bell pepper
- 1 cup / 150g, halved Cherry tomatoes
- 1½ cups / 280g, washed Basmati rice
- 2 cups / 480 ml Chicken stock
- ½ tsp / 0.25g, steeped in 2 tbsp warm water Saffron threads
- 1 tsp / 5g Turmeric
- 1 tsp / 5g Cumin
- ½ tsp / 2g, or to taste Chili flakes
Method
- Season the chicken thighs on all sides with salt, black pepper, smoked paprika, and garlic powder. Let them sit at room temperature for 10 minutes. Heat a wide, oven-safe pot over medium-high heat, add the olive oil, and lay the chicken skin-side down without crowding. Sear for 5–7 minutes without moving until the skin is deep golden. Flip and sear the other side for 2–3 minutes, then remove and set aside. The fond left in the pot is flavor.
- Reduce the heat to medium and add the diced onion to the fat left in the pot. Cook for 4–5 minutes until softened, then add the minced garlic and cook for another minute. Add the chopped red bell pepper and halved cherry tomatoes and stir to combine. Cook for 2–3 minutes until the tomatoes begin to soften.
- Add the washed basmati rice to the pot and stir to coat every grain in the aromatics. Toast for 1–2 minutes, stirring constantly, until the rice turns slightly opaque and smells faintly nutty. This prevents the grains from becoming sticky when the liquid goes in.
- Steep the saffron threads in 2 tablespoons of warm water for 2–3 minutes until the water turns deep golden-orange. Add the saffron water, chicken stock, turmeric, cumin, and chili flakes to the pot. Stir well, scraping up any stuck bits from the base, and season to taste.
- Return the seared chicken pieces on top of the rice, skin-side up so the skin stays exposed. Bring to a gentle simmer, then cover tightly and reduce the heat to low. Cook for 20–25 minutes without lifting the lid. The steam inside is doing the work, and releasing it disrupts the even cook. The chicken is done when the juices run clear if pierced at the thickest part — 165°F (74°C) internal.
- Remove from heat and rest, still covered, for 5–10 minutes. The rice finishes steaming and any remaining liquid absorbs completely. Lift the lid away from you to avoid the rush of steam. The rice should be golden-tinged, fluffy, and separate, with the chicken resting on top.
Creamy Garlic Chicken

Creamy garlic chicken is comfort food with restraint. Rich without being heavy, the sauce glossy and smooth rather than thick and stodgy. The key is building the sauce in the same pan you sear the chicken, so every bit of flavor that develops during the initial cook gets drawn into the cream as it reduces. Parmesan goes in at the end and adds a savory depth that holds the whole sauce together. This is the kind of dish that looks and tastes considered, but comes together in under 30 minutes.
The evening softens
An intimate voice and gentle piano slow the room down while the garlic sauce turns creamy.
♫ Norah Jones Essentials — listen on Apple Music ↗Ingredients
- 1.3 lbs / 600g Chicken breasts
- 1 cup / 240 ml Cream
- 4 cloves / 20g, minced Garlic
- 3 tbsp / 40g Butter
- 2 sprigs Fresh thyme
- small handful, roughly chopped, to finish Flat-leaf parsley
- ½ cup / 50g, grated Parmesan
- 1 tsp / 6g Salt
- ½ tsp / 3g Black pepper
Method
- Season the chicken generously with salt and pepper on both sides. Heat a splash of oil in a wide, heavy-based pan over medium-high heat until shimmering, then add the chicken and press it gently flat. Sear without moving for 4–5 minutes until golden on the first side, then flip and cook the second side. Remove and set aside. The chicken will finish cooking in the sauce later.
- Reduce the heat to medium and add the butter to the same pan, scraping up any browned bits left from the chicken. Add the minced garlic and fresh thyme sprigs and cook gently for 1–2 minutes. You want the garlic soft and fragrant, not browned; it should smell sweet and mellow rather than sharp. Remove the thyme sprigs before adding the cream.
- Pour in the cream and stir to combine with the garlic and any butter left in the pan. Bring to a gentle simmer and let it reduce for 3–4 minutes, stirring occasionally, until the sauce coats the back of a spoon. It should look silky, not watery.
- Stir in the grated parmesan in small amounts, letting each addition melt before adding the next. The cheese thickens the sauce and adds salt and depth. Taste before adding more. If the sauce gets too thick, loosen it with a splash of the chicken's resting juices or a little stock.
- Return the chicken to the pan and nestle it into the sauce. Cook on low heat for 5–8 minutes, spooning the sauce over the top, until the chicken is cooked through and the sauce has settled around it. The internal temperature should read 74°C / 165°F at the thickest point. Remove from heat, scatter the chopped parsley over the top, and serve.
Pan-Seared Salmon
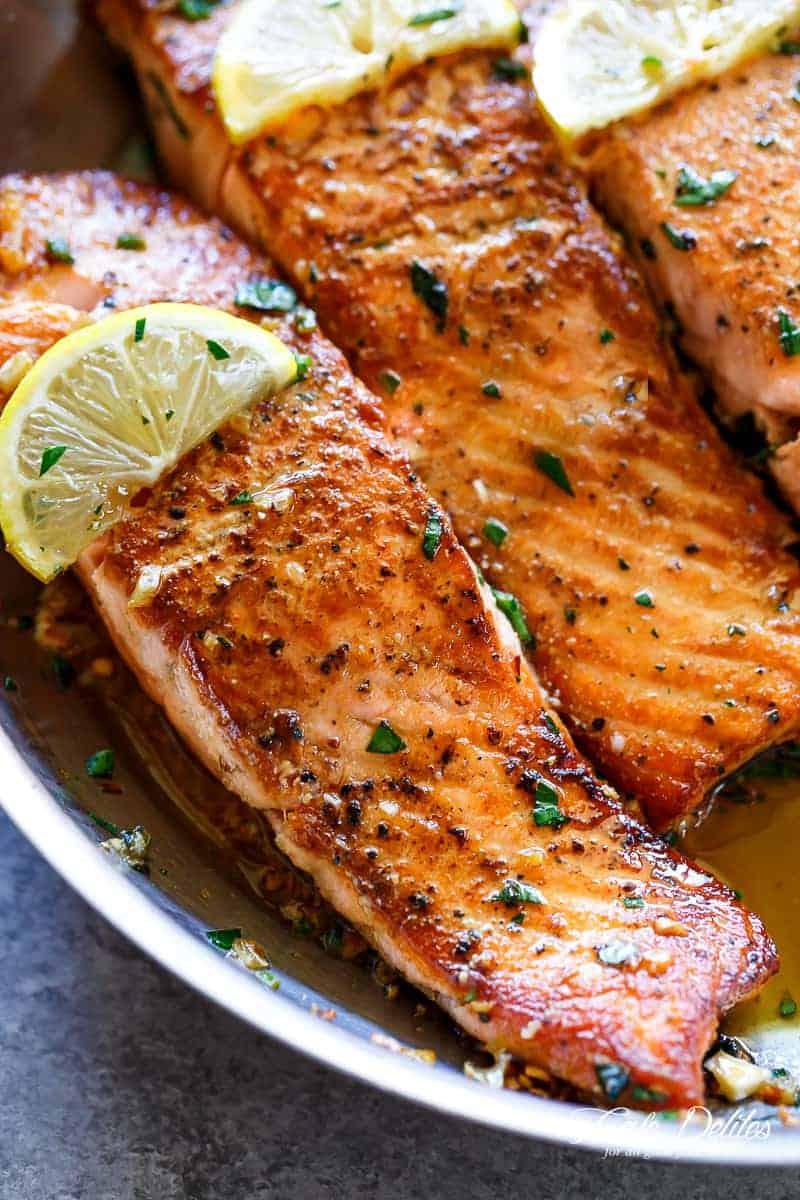
Pan-seared salmon is a test of technique more than anything else. The fish itself is forgiving, but getting the skin genuinely crisp while keeping the flesh moist and just cooked through requires attention and patience. The key is starting skin-side down in a hot, dry pan and not moving it. The skin renders and crisps against the surface, and the heat travels slowly upward through the flesh. A brief flip at the end finishes it, and the butter baste rounds the flavor and adds a final gloss to the surface.
A clear, calm evening
Spacious electronic textures and steady beats leave room to focus on crisp salmon skin and a simple finish.
♫ Tycho Essentials — listen on Apple Music ↗Ingredients
- 2 fillets, about 6 oz / 170g each Salmon fillets, skin-on
- ¾ tsp / 4g Salt
- ¼ tsp / 2g Black pepper
- 1–2 tbsp / 15–30 ml Olive oil or neutral oil
- 1 tbsp / 14g, optional, for basting Butter
- 2 cloves, optional, crushed, for basting Garlic
- for serving Lemon wedges
- optional, for serving Fresh thyme or parsley
Method
- Pat each salmon fillet completely dry with paper towels, particularly on the skin side. Moisture on the skin is the main reason skin sticks and doesn't crisp. Season the flesh side with the measured salt and black pepper. Season the skin just before it goes into the pan so it doesn't draw moisture out too early.
- Heat a non-stick or well-seasoned stainless pan over medium-high heat with olive oil or neutral oil. When the oil shimmers and just begins to smoke at the edges, lay the salmon in skin-side down. Press gently with a spatula for the first 10 seconds to ensure full contact with the pan, then leave completely undisturbed.
- Cook skin-side down for 4–5 minutes, depending on thickness, until the skin is visibly crisp and the flesh has turned opaque about two-thirds of the way up the side. Don't rush the flip. If the skin sticks, it's not ready. When it releases cleanly from the pan, it's ready.
- Flip the fillet. If using, add the butter and crushed garlic cloves to the pan now. As the butter foams, spoon it continuously over the flesh for 60–90 seconds to finish cooking gently. The flesh should look just opaque through the thickest part and feel slightly yielding when pressed. Serve with lemon wedges and fresh herbs.
Garlic Shrimp Skillet
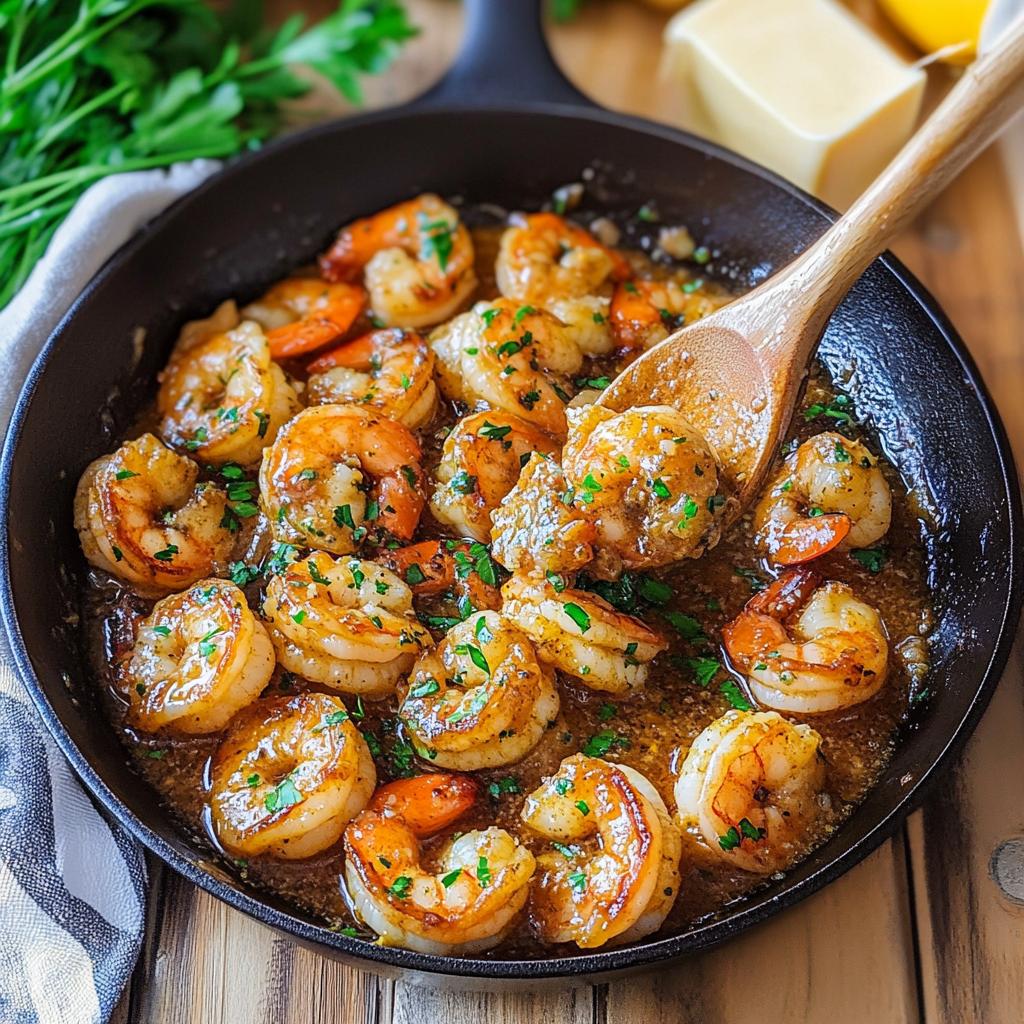
Garlic shrimp skillet is fast food in the best sense. The whole dish is built in one pan in under ten minutes, but it tastes like something more considered. The butter browns gently, the garlic softens in the fat, and the shrimp finish in that fragrant base just long enough to turn opaque. A squeeze of lemon at the end lifts everything and cuts the richness. This is a weeknight dish that punches well above its time investment, and it works over pasta, rice, or with bread to catch the butter sauce.
A little rhythm in the skillet
Playful piano and rhythmic turns make quick garlic prep and a sizzling shrimp supper feel light on their feet.
♫ Dave Brubeck Essentials — listen on Apple Music ↗Ingredients
- 1 lb / 500g, peeled & deveined Shrimp
- 3½ tbsp / 50g Butter
- 3 cloves / 15g, finely chopped Garlic
- 2 tbsp / 30 ml Lemon juice
- 1 tsp / 5g Salt
- ¼ tsp / 2g Black pepper
- Fresh parsley
Method
- Place a wide skillet over medium heat and add the butter. Let it melt and foam, then continue past the foam to where it starts to smell faintly nutty and turns a light golden color. This slight browning deepens the butter's flavor and makes the base of the sauce richer.
- Add the minced garlic and stir continuously for 30–45 seconds. Watch carefully. Garlic in hot butter goes from golden to burnt in seconds, and burnt garlic turns the whole dish bitter. You want it fragrant, lightly golden, and smelling sweet. Reduce heat slightly if the pan feels too aggressive.
- Add the shrimp in a single, uncrowded layer. If they're stacked or close together they'll steam instead of sear, and the texture turns soft rather than snappy. Leave them undisturbed for 1½–2 minutes until the edges turn pink and opaque.
- Flip each shrimp once and cook the second side for another minute. They're done the moment they're fully opaque. Don't wait for them to firm up completely or they'll be overcooked. A properly cooked shrimp holds a relaxed C-shape; a tight curl means it went too long.
- Squeeze lemon juice over the pan and add any lemon zest, season with salt and black pepper, and toss gently to coat everything in the sauce. The acid lifts the brown bits from the base of the pan and brightens the butter. Serve immediately, spooning the pan sauce over everything.
Chicken Stir Fry

Stir fry is high-heat cooking that rewards confidence and punishes hesitation. Everything happens fast. The chicken takes two minutes, the vegetables a little longer, and the sauce goes in at the very end. The key is having everything prepped and within reach before the pan goes on, because once the heat is up there's no time to chop or measure. Done right, the result has a faint smokiness from the hot wok or pan, tender-crisp vegetables, and a glaze that coats everything evenly without pooling.
Ready, set, sizzle
Percussive acoustic guitars match the quick, coordinated work of a stir-fry, bringing energy without relying on a cuisine cliché.
♫ Rodrigo y Gabriela Essentials — listen on Apple Music ↗Ingredients
- 2, about 1.3 lbs / 600g, sliced thin Chicken breasts
- 2 cups / 300g, such as broccoli, bell peppers, carrots, snap peas Mixed vegetables
- 2 tbsp / 30 ml, vegetable or sesame Oil
- 3 cloves / 15g, minced Garlic
- 1 tsp / 5g, minced, optional Ginger
- ¼ cup / 60 ml Soy sauce
- 2 tbsp / 30 ml Oyster sauce
- 1 tbsp / 15g Honey or brown sugar
- 1 tbsp / 8g Cornstarch
- ½ cup / 120 ml Water or chicken broth
Method
- Before anything goes on the stovetop, whisk together the soy sauce, oyster sauce, honey or brown sugar, cornstarch, and water or chicken broth in a small bowl. Set aside. Slice the chicken breasts thin and crosswise against the grain. Have all ingredients prepped and within reach — once the heat is up there's no time to stop and measure.
- Heat a wok or wide pan over the highest heat your stovetop can produce and let it heat for 2–3 minutes before anything goes in. A properly hot pan is the difference between a stir fry and a steam. If using a gas burner, let the flame lick the sides of the wok. The surface should be nearly smoking before the oil goes in.
- Add the oil and then the chicken slices in a single layer. Leave undisturbed for 60–90 seconds to build color, then toss quickly. Cook for 3–4 minutes total until just cooked through and lightly caramelized on the outside. Thin slices should be opaque all the way through; if checking with a thermometer, chicken should reach 165°F (74°C). Remove to a plate — it will finish in the sauce.
- Without wiping the pan, add the vegetables in order of cooking time: harder vegetables like broccoli and carrots first, softer ones like bell peppers and snap peas a minute later. Toss constantly over high heat. The goal is tender-crisp — the vegetables should still have a slight bite. Do not let them soften fully.
- Push the vegetables to one side. Add the minced garlic and optional ginger to the cleared space. Let sizzle for 20–30 seconds until fragrant, then toss everything together so the aromatics coat the vegetables evenly.
- Return the chicken to the pan. Give the sauce a quick stir, then pour it in all at once. Toss vigorously over high heat for 60–90 seconds until the sauce thickens, turns glossy, and coats every piece evenly. Serve immediately over rice or noodles.
Spicy Honey Chicken

Spicy honey chicken works because of contrast: each piece is fried until genuinely crisp, then tossed in a hot, sticky glaze just before serving. The honey hits first, rounding and caramelizing the edges, and the heat builds slowly behind it. The key is keeping those two moments — frying and saucing — completely separate. Toss the chicken too early and the coating goes soft. Get the fry right, build the sauce in a separate pan, then bring everything together at the last moment. Every piece should be lacquered, not drowned.
Sweet heat, steady groove
Lean New Orleans funk gives the glaze a rhythmic partner as honey bubbles and the chicken takes on color.
♫ The Meters Essentials — listen on Apple Music ↗Ingredients
- 2, cut into bite-size pieces Chicken breasts or thighs
- ½ cup / 60g Flour
- ¼ cup / 30g Cornstarch
- 1 tsp / 6g Salt
- 1 tsp / 5g Black pepper
- 1 tsp / 5g Paprika
- Oil for frying
- ⅓ cup / 80 ml Honey
- 2 tbsp / 30 ml Soy sauce
- 2 tbsp / 30 ml, adjust to heat level Hot sauce
- 1 tbsp Chili paste or chili flakes
- 3 cloves / 15g, minced Garlic
- 1 tbsp / 14g Butter
- 2 tbsp / 30 ml Water
Method
- Cut the chicken into bite-size pieces, about 1½ inches across. In a wide bowl, whisk together the flour, cornstarch, salt, black pepper, and paprika. Dredge each piece thoroughly in the seasoned flour, pressing to adhere and coating every surface. Shake off the excess and set on a plate.
- Heat about 1 inch of oil in a wide, heavy pan to 350°F (175°C). Fry the chicken in batches, leaving space between pieces, for 4–5 minutes, turning once, until deep golden and cooked through to 165°F (74°C). Don't crowd the pan — the temperature drops and the coating turns soggy instead of crisp. Drain on a wire rack.
- While the chicken fries, combine the honey, soy sauce, hot sauce, chili paste or flakes, minced garlic, butter, and water in a small saucepan over medium heat. Stir and simmer for 2–3 minutes until slightly thickened and glossy. Taste and adjust the chili for heat. The sauce should be sweet upfront with a clear, building warmth on the finish.
- Toss the crispy chicken pieces in the warm sauce immediately before serving. Work quickly: the coating loses its crispness once the sauce goes on, so coat just before plating and serve right away. Every piece should be evenly lacquered, not sitting in pooled sauce.
Slow Roast Lamb

Slow-roasted lamb is patience made tangible, a long, gentle cook that takes something tough and transforms it into something that falls apart at the touch of a fork. The collagen in the tougher cuts breaks down over hours into gelatin, which is what gives slow-cooked lamb its particular richness and silkiness. The seasoning goes on at the start and builds as the fat renders and bastes the meat continuously throughout the cook. The result is deeply savory, falling-apart tender, and impossible to rush.
A long Sunday supper
A warm, unhurried voice carries the evening from the roast’s first aromas to the moment everyone sits down.
♫ Leon Bridges Essentials — listen on Apple Music ↗Ingredients
- 3.3 lbs / 1.5 kg Lamb shoulder
- 4 tbsp / 60 ml Olive oil
- 6 cloves / 30g, crushed Garlic
- from 2 lemons Lemon zest
- from 2 lemons, about ¼ cup / 60 ml Lemon juice
- 2 tsp / 12g Salt
- 1½ tsp / 8g Black pepper
- 1 tbsp / 7g Paprika
- 1 tbsp, chopped Fresh rosemary, or dried rosemary (2 tsp)
- 1 tbsp fresh, or 1 tsp dried Thyme
- 1 tsp / 5g, optional Cumin
- 1 medium, sliced Onion
- 1 cup / 240 ml Chicken stock
- ½ cup / 120 ml White wine
Method
- Mix together the olive oil, crushed garlic, lemon zest, lemon juice, paprika, rosemary, thyme, optional cumin, salt, and black pepper into a thick paste. Score the lamb shoulder in several places with a knife and push some of the paste into the cuts so it seasons from the inside as the fat renders. Rub the rest all over the surface. Let the lamb sit at room temperature for 30 minutes.
- Scatter the sliced onion across the base of a deep roasting dish. Pour in the chicken stock and white wine. Set the lamb on top, fat-side up. The liquid creates a moist environment in the oven and the onions absorb the drippings, becoming deeply savory and ideal for serving alongside.
- Cover the dish tightly with foil and roast at 325°F (160°C) for 3–3½ hours. Slow roasting at low temperature is non-negotiable. High heat tightens the muscle fibers and you end up with meat that's cooked through but still tough. Check every hour and baste with the pan juices.
- After 3 hours, remove the foil and roast uncovered for the final 30–45 minutes to develop color on the surface. The lamb is ready when it yields completely to a fork with no resistance and the meat begins to pull away from the bone naturally. Rest for at least 20 minutes before pulling or slicing. Serve with the pan juices and onions spooned over.
Pollo Croquetas

Croquetas are the result of patience and technique working together, a thick, silky bechamel enriched with shredded chicken, chilled until firm, shaped, coated, and fried until the outside shatters and the inside is molten and soft. Getting the bechamel right is the foundation of everything else: it needs to be thick enough to hold its shape when cold but soft enough that it melts in the mouth when fried. These are the kind of bites that vanish from a plate before they've had time to cool.
Little bites, lively hands
Nimble acoustic swing keeps rolling and coating croquetas companionable, then carries through to the first crisp bite.
♫ Django Reinhardt Essentials — listen on Apple Music ↗Ingredients
- 2 cups / 400g, finely shredded or minced Cooked chicken
- 3 tbsp / 40g Butter
- ¼ cup / 40g, very finely chopped Onion
- 3 tbsp / 24g Flour
- 1 cup / 240 ml, warm Milk
- ½ tsp / 3g Salt
- ½ tsp / 3g Black pepper
- ½ tsp / 3g Paprika
- ¼ tsp Nutmeg
- 2 tbsp, chopped Fresh parsley
- 2, beaten Eggs
- 1 cup / 100g Breadcrumbs
- Oil for frying
Method
- Melt the butter in a heavy saucepan over medium heat. Add the finely chopped onion and cook for 3–4 minutes until soft and translucent, stirring occasionally. Add the flour all at once and stir vigorously with a wooden spoon to form a roux. Cook for 1–2 minutes, stirring constantly, until it smells slightly toasty and turns a pale straw color.
- Add the warm milk a ladleful at a time, whisking constantly after each addition before adding the next. The mixture will seize up as the first milk hits, then relax and smooth as you whisk. Keep adding until the sauce is thick, smooth, and falls slowly from the whisk in ribbons.
- Remove from heat and fold in the finely shredded chicken, salt, black pepper, paprika, nutmeg, and chopped parsley. Mix until evenly combined. The mixture should be very thick, closer to stiff mashed potato than a pourable sauce. Taste and season; it should feel slightly over-seasoned warm — it will taste right when cold.
- Spread the mixture onto a lined tray to a depth of about ¾ inch (2 cm). Press plastic wrap directly onto the surface to prevent a skin forming, then refrigerate for at least 2 hours or overnight until completely firm. The mixture must be properly cold before shaping.
- Use wet hands or two spoons to shape the firm mixture into tight logs, each about the size of a large finger. Work quickly and keep them compact. Any cracks in the surface will open during frying. Refrigerate again if they soften during shaping.
- Set up a coating station: beaten egg in one shallow bowl, breadcrumbs in another. Dip each croqueta in egg to coat thoroughly, then roll in breadcrumbs, pressing gently so the coating adheres evenly all over.
- Fry in oil held at 350°F (175°C) in small batches so the temperature stays stable. Lower gently and cook for 2–3 minutes, turning once, until deep golden all over. Drain briefly on a rack and serve within a few minutes while the outside is crisp and the inside is warm and soft.
Ropa Vieja

Ropa vieja, literally 'old clothes', is Cuban soul food: long-braised flank steak pulled into strips and simmered back through a deeply flavored tomato and pepper sofrito. The name describes how the shredded meat falls apart into ribbons, draped with sauce. It's a dish that rewards patience; the first hour is all slow heat breaking down tough connective tissue, and the second is absorption. The pulled meat drinks back the sauce it cooked in. The result is deeply savory, slightly sweet, and layered with spice in a way that builds slowly as you eat.
A slow pot and a soulful evening
A full, expressive voice gives the long braise company and makes the finished comfort food feel generous.
♫ Otis Redding Essentials — listen on Apple Music ↗Ingredients
- 2 lbs / 900g Flank steak
- 1 large / 200g, sliced Onion
- 2 cups / 300g Bell peppers
- 4 cloves / 20g Garlic
- 1 can / 400g Crushed tomatoes
- 1 tsp / 5g Cumin
- 2 tbsp / 30 ml Olive oil
- 2 tbsp / 30g Tomato paste
- 1 cup / 240 ml Beef broth
- ½ cup / 80g, sliced Green olives
- 1 tsp / 6g Salt
- 1 tsp / 5g Black pepper
- 1 tsp / 5g Paprika
- 1 tsp / 2g Oregano
- 1 Bay leaf
- 1 tbsp / 15 ml Lime juice
Method
- Pat the flank steak dry and season generously on both sides with the salt and black pepper. Heat a wide, heavy pot or Dutch oven over high heat with the olive oil and sear the beef deeply, 3–4 minutes per side, until you have a proper dark crust. Don't rush this. The fond left in the base of the pot becomes the foundation of the sauce's depth.
- Remove the beef and reduce to medium heat. Add the diced onion and sliced bell peppers and cook for 6–7 minutes until softened and beginning to color. Add the minced garlic for the last minute, stirring so it doesn't burn.
- Push the vegetables to the side. Add the cumin and paprika directly to the cleared space and toast for 30 seconds until fragrant. Add the tomato paste and stir into the spices, cooking for 1 minute until it darkens slightly. These steps — blooming the spices, cooking the tomato paste — build the base flavor of the whole dish.
- Pour in the crushed tomatoes and beef broth, stirring to deglaze and scrape up all the fond from the base. Add the oregano and bay leaf. Return the seared beef, nestling it into the sauce, and bring to a gentle simmer. Cover tightly and cook on low heat for 2–3 hours, turning the beef once halfway through.
- Check at 2 hours. The beef should be tender enough that it begins to separate when pressed. If it resists, cover and continue. When ready, transfer to a board and pull into long strips using two forks, following the natural grain of the meat.
- Return the pulled beef to the sauce and stir to combine. Add the sliced green olives and stir through. Simmer uncovered for 15–20 minutes so the meat absorbs the sauce. Remove and discard the bay leaf. Finish with the lime juice, taste and adjust seasoning. Serve over white rice.
Fried Sweet Plantains

Sweet fried plantains are one of the most satisfying simple dishes in Latin and Caribbean cooking. They are caramelized on the outside, soft and almost jammy on the inside, with a natural sweetness that deepens in the oil. The only thing that matters is starting with the right plantain: it must be deeply yellow with black patches, soft to the touch, fully ripe. An under-ripe plantain won't caramelize and will taste starchy instead of sweet. Get that right and this dish practically makes itself.
A sweet, celebratory side
Celia’s exuberance meets caramelized plantains with a burst of joy, ready for a table that keeps talking.
♫ Celia Cruz Essentials — listen on Apple Music ↗Ingredients
- 3–4, heavily spotted Ripe plantains
- for frying Oil
- pinch, optional, for finishing Salt
Method
- Slice the ripe plantains on a diagonal into pieces about 1–2cm thick. The diagonal cut increases the surface area that hits the oil, which means more caramelization and a better crust. The plantain should feel slightly soft when you press it. If it's firm and pale yellow, leave it to ripen for another day or two.
- Pour about 1cm of vegetable or coconut oil into a wide skillet and heat over medium heat until a small piece of plantain sizzles immediately on contact. The temperature needs to be steady and medium. Too hot and the outside burns before the inside softens, too cool and they absorb oil without caramelizing.
- Add the slices in a single layer without overlapping. Cook for 2–3 minutes on the first side without touching them, until deeply golden and slightly caramelized at the edges. You're looking for a mahogany-brown color, not pale gold. That deep color is where the sweetness concentrates. Flip once only and cook the second side for another 1–2 minutes. Drain briefly on a rack. Season with a pinch of salt if desired — it sharpens the sweetness without making the dish salty. Serve warm.
Tostones (Twice-Fried Plantains)

Tostones are the savory counterpart to sweet fried plantains. Twice-fried green plantain rounds that come out crackling crisp and golden, with a starchy, lightly nutty interior. The double-fry is the technique that defines them: the first fry softens the plantain through, the smashing opens up the surface area, and the second fry creates a shatteringly crisp crust. They're best eaten immediately, straight from the oil with a heavy pinch of salt, used as a scoop for black beans or mojo sauce.
Two fries and a little swing
Lively percussion and horns echo the rhythm of pressing and frying these crisp bites for company.
♫ Tito Puente Essentials — listen on Apple Music ↗Ingredients
- 3 Green plantains
- Oil
- to taste Salt
Method
- Peel the green plantains. Use a knife to score the skin lengthwise and peel it off; green plantain skin is thicker than ripe and won't pull away easily by hand. Cut into rounds about 2–3cm thick. They should be firm and starchy, not soft. That firmness is what allows them to hold their shape through two fries.
- Heat about 2cm of oil in a wide pan over medium heat. Fry the plantain rounds in batches for 3–4 minutes, turning once, until they're just cooked through and lightly golden but not yet crisp. They should give slightly when pressed. This first fry is about cooking the starch, not building the crust. Drain on a rack.
- While still warm and pliable, flatten each round to about 1cm thick using the flat side of a heavy glass, the bottom of a cup, or a tostonera if you have one. Press firmly and evenly. You want a flat disc with rough, craggly edges, not a smooth thin sheet. The rough surface creates more surface area for the second fry.
- Return the oil to medium-high heat and fry the flattened rounds in batches again for 2–3 minutes per side until deeply golden, crisp, and crackling when you knock them with a spoon. The second fry transforms the texture completely. The outside should shatter, the inside stays soft.
- Transfer immediately to a rack and season generously with flaky salt while still hot and just out of the oil. The salt needs to go on right away to stick. Serve within a few minutes. Tostones lose their crispness as they sit.
Stuffed Mini Peppers

Stuffed mini peppers are party food done with intention. Each one is a clean, self-contained bite with bright color, a soft pepper shell, and a creamy filling that's seasoned properly rather than bland. The cream cheese base needs to be seasoned assertively because the pepper itself is sweet and will dominate anything mild. Roasting transforms the peppers: they soften and sweeten, the skins blister slightly, and the filling sets to a warm, pillowy texture. These are the bites people reach for first and keep coming back to.
Color on the counter
Playful trumpet melodies suit a tray of bright little peppers and the easy pleasure of assembling them together.
♫ Herb Alpert Essentials — listen on Apple Music ↗Ingredients
- ~12–15 peppers / 500g Mini peppers
- 1 cup / 200g Cream cheese
- 2 cloves / 10g, finely grated Garlic
- parsley or chives Fresh herbs
- ¾ tsp / 4g Salt
- ¼ tsp / 2g Black pepper
- 2 tbsp / 30g Sour cream or Greek yogurt
- 1 tbsp / 15 ml Olive oil
Method
- Halve the mini peppers lengthwise and remove the seeds and white membrane cleanly using a small spoon or your finger. The membrane is where any bitterness concentrates, so remove it thoroughly. Pat the inside dry. Moisture in the pepper pocket will make the filling slide during baking.
- In a bowl, combine the softened cream cheese, sour cream or Greek yogurt, finely grated garlic, chopped fresh herbs, salt, and black pepper. Mix until evenly combined and smooth. The yogurt or sour cream lightens the texture and adds a gentle tang. The filling should be well-seasoned — almost over-seasoned when tasted on its own — because the sweet pepper rounds it out significantly.
- Spoon or pipe the filling into each pepper half, filling it level with the rim. Don't mound the filling above the edges. It spills over during baking and the presentation suffers. An even, flush fill looks clean and bakes evenly.
- Brush or drizzle the olive oil lightly over the pepper shells before filling, or toss the halved peppers briefly in the oil to coat the outside. Arrange filled peppers on a lined baking tray and roast at 375°F (190°C) for 15–20 minutes until the pepper shells are softened and slightly blistered and the filling is just starting to color at the edges. Allow to cool briefly before serving.
Mini Sliders

Mini sliders are a precision exercise. Everything is smaller, which means there's less margin for error and less room to hide poor technique. The patty needs to be loosely formed and seasoned just before cooking so the texture stays tender and the crust forms fast. A brief, high-heat sear, melted cheese in the final seconds, and immediate assembly while everything is still hot. Stack them right and each bite has the same ratio of bun, meat, sauce, and topping. That consistency is what separates a good slider from a great one.
The gathering starts here
Party-ready grooves make a tray of sliders feel like an invitation for everyone to come into the kitchen.
♫ Kool & The Gang Essentials — listen on Apple Music ↗Ingredients
- 1 lb / 500g Ground beef
- 1½ tsp / 8g Salt
- ½ tsp / 3g Black pepper
- Slider buns
- Cheese slices
- 1½ tbsp / 20g, for toasting buns Butter
Method
- Divide the ground beef into equal portions, about 60–70g each for a proper slider, and shape gently into rounds slightly wider than the bun, as they shrink during cooking. Handle the meat as little as possible: overworking compresses the proteins and makes the patties dense and tough rather than tender. A rough, lightly pressed shape is better than a smooth, tightly packed one.
- Season the patties on both sides with salt and pepper right before they go into the pan, not ahead of time. Salt draws moisture out through osmosis; seasoning early creates a wet surface that steams instead of searing. The patties should hit the pan dry and cool.
- Sear over high heat in a cast iron or heavy-based pan with a thin film of oil. Cook for 2–3 minutes per side. Don't press down with a spatula, which squeezes out the juices. You're looking for a deep brown crust with caramelized edges. Cook ground beef patties through to 160°F (71°C) with no pink remaining in the centre — use a thermometer if you have one.
- In the final 30 seconds, add a slice of cheese to each patty and cover the pan with a lid or a splash of water to create steam. The cheese melts in about 20–30 seconds and should be flowing but not completely liquefied. Pull immediately.
- Melt the butter in the same pan over medium heat and toast the bun halves cut-side down for 60–90 seconds until golden. Assemble the sliders right away while everything is hot: buttered bun base, sauce, patty, toppings, bun top. Serve immediately.
Loaded Nachos (Chef Style)

Loaded nachos done properly are about structure and restraint. The temptation is to pile everything on at once, but the result is soggy chips at the bottom and an uneven mess. The key is layering: chips, then a seasoned base, then cheese, so every level gets heat and coverage. Fresh toppings go on after baking, not before, so they stay bright and crisp against the warm base. Every chip in the tray should carry something worth eating. That's the standard.
One tray, everyone welcome
Layered melodies and familiar grooves suit building a generous tray of nachos with friends choosing their favorite toppings.
♫ Stevie Wonder Essentials — listen on Apple Music ↗Ingredients
- 10 oz / 300g Tortilla chips
- 1 lb / 500g Ground beef
- 1 tbsp / 15 ml Olive oil
- 1 tsp / 6g Salt
- 1 tsp / 5g Black pepper
- 1 tsp / 5g Paprika
- 1 tsp / 5g Cumin
- 1 tsp / 5g Garlic powder
- ½ tsp / 2g Chili flakes
- 2 tbsp / 30g Tomato paste
- ¼ cup / 60 ml Water
- 2 cups / 200g Cheese, shredded
- 1 cup / 200g, drained Black beans
- ½ cup / 80g Diced tomatoes
- to taste, sliced Jalapeños
- for serving Sour cream or crema
- ½ cup / 120 ml Salsa
- handful, for serving Cilantro
- for serving Lime wedges
- for serving Avocado or guacamole
- 2, sliced Green onions
Method
- Heat the olive oil in a wide pan over high heat. Add the ground beef and break it apart as it cooks. Don't stir constantly — let it develop color. Once browned and the moisture has cooked off, add the salt, black pepper, paprika, cumin, garlic powder, and chili flakes. Stir to coat the beef evenly. Push everything to the side, add the tomato paste to the cleared space, and cook for 1 minute until it darkens slightly. Stir everything together, pour in the water, and simmer until thickened. The beef should be bold and well-seasoned.
- Spread a single, even layer of tortilla chips across a wide, oven-safe tray — tiled across the surface, not piled deep. Scatter the seasoned beef evenly over the chips, followed by the drained black beans, then a generous layer of shredded cheese that covers most of the surface.
- For a second layer of depth, add a few more chips, a scattering of beef and beans, and another layer of cheese. Keep it controlled. A third layer buries the bottom chips completely and they never get direct heat.
- Bake at 375°F (190°C) for 10–12 minutes until the cheese is fully melted, bubbling, and just beginning to color at the edges. The base chips should be hot and crisped.
- Add all fresh toppings after the nachos come out of the oven: diced tomatoes, sour cream or crema, sliced jalapeños, avocado or guacamole, salsa, cilantro, sliced green onions, and lime wedges on the side. Cold toppings against the hot nachos is part of what makes them work. Serve immediately — nachos degrade quickly as the chips absorb moisture.
Ice Cream Bar (Event Style)
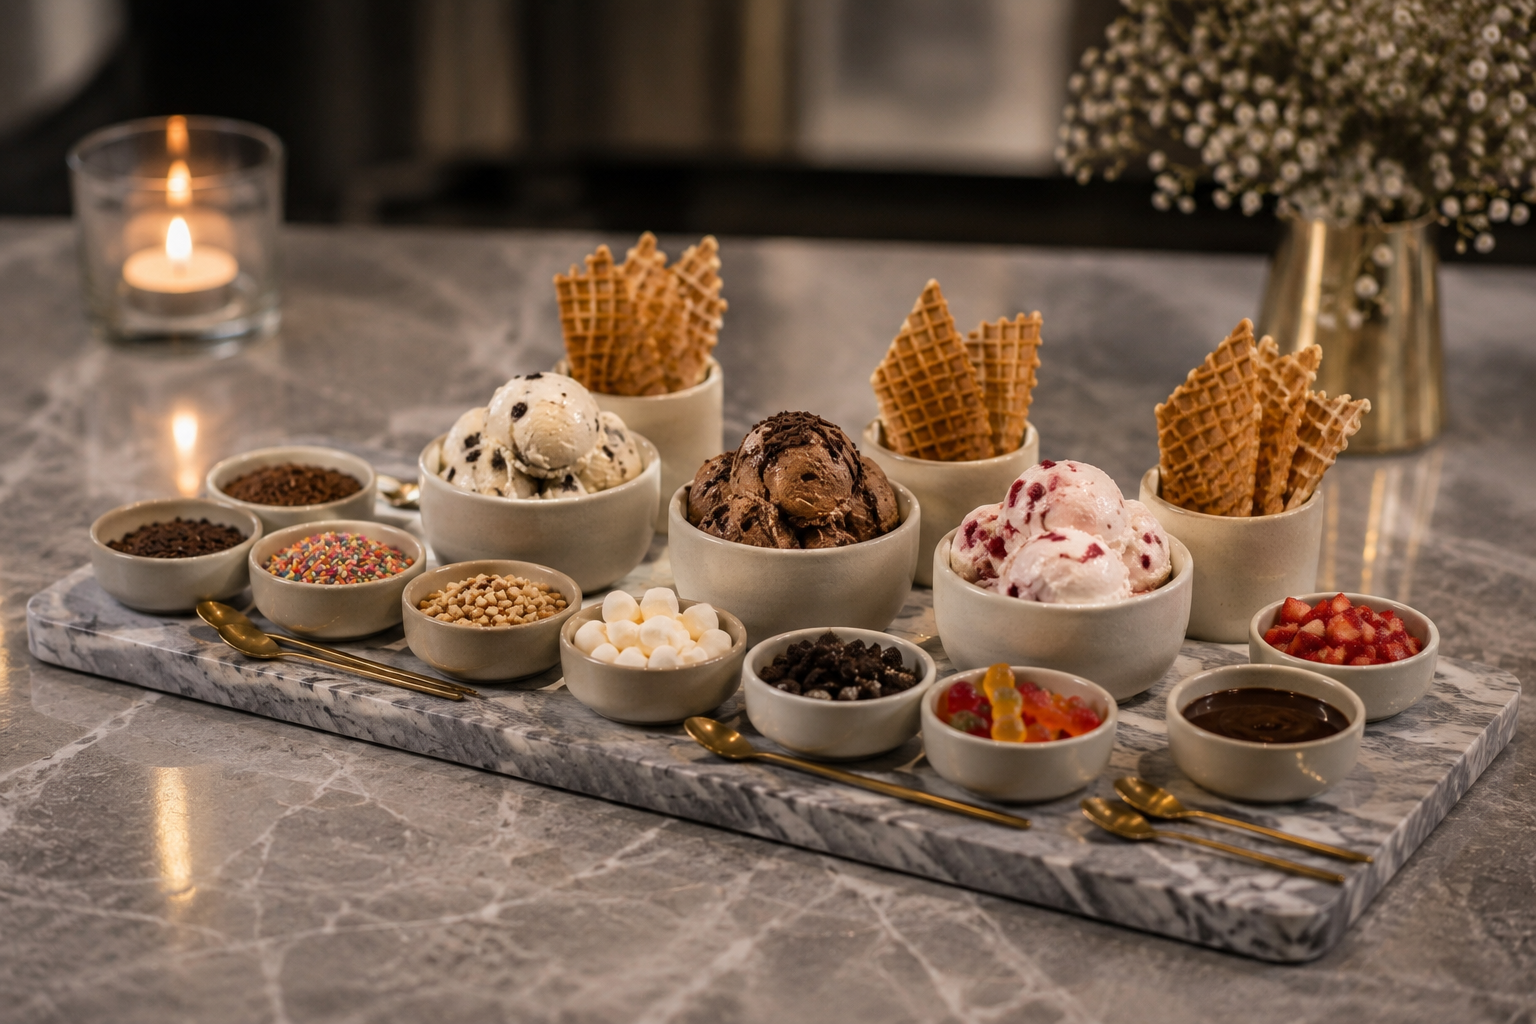
An ice cream bar is a dessert experience that works at any scale — a weeknight treat for the family or a fully staged event station for a crowd. The foundation is a proper custard base: egg yolks and cream cooked gently into something rich, silky, and deeply vanilla. It takes about 30 minutes to make and rewards you with ice cream that is far more decadent and luxe than anything from a carton. The toppings are where personality comes in. Give people choices, keep the setup clean, and let the experience build itself.
A scoop of summer
Sunny harmonies lend an old-fashioned summer feeling to an ice-cream bar where everyone makes something different.
♫ The Beach Boys Essentials — listen on Apple Music ↗Ingredients
- 2 cups / 480 ml Heavy cream
- 1 cup / 240 ml Whole milk
- ¾ cup / 150g Sugar
- 4 Egg yolks
- 1 tbsp / 15 ml Vanilla extract, or 1 vanilla bean for premium flavor
- pinch Salt
- Toppings: chocolate sauce, caramel, crushed cookies, fresh fruit, nuts, sprinkles
Method
- Whisk the egg yolks and sugar together in a bowl until the mixture turns pale and slightly thickened. In a saucepan, warm the cream and milk over medium heat until just steaming — do not boil. Slowly pour about half the warm cream mixture into the egg yolks while whisking constantly. This tempers the eggs so they don't scramble.
- Pour the tempered egg mixture back into the saucepan with the remaining cream. Cook over medium-low heat, stirring continuously with a wooden spoon or silicone spatula, until the custard thickens slightly and coats the back of the spoon. This takes 8–10 minutes. Do not let it boil.
- Remove from heat. Stir in the vanilla extract and a pinch of salt. Strain through a fine-mesh sieve into a clean bowl. Press plastic wrap directly onto the surface and refrigerate until fully cold, at least 4 hours or overnight.
- Churn the cold custard base in an ice cream maker according to its instructions, typically 20–25 minutes, until it reaches a soft-serve consistency. Transfer to a freezer-safe container and freeze for 2 hours until firm enough to scoop. No ice cream maker? Pour the chilled custard into a freezer-safe container and freeze, stirring vigorously every 30 minutes for the first 2 hours to break up ice crystals.
- To serve as a bar: keep ice cream in wide, shallow containers nested inside a tray of ice to maintain a scoopable consistency. Arrange toppings in small bowls grouped by type — wet toppings (sauces, compotes) together, dry toppings (nuts, cookies, sprinkles) together. Label each clearly. Provide a dedicated spoon or tong per topping. Restock and wipe surfaces regularly during service. For a family-size setup, simply lay everything on the counter and let people build their own bowl.
Classic Brownies

A classic brownie lives in the tension between structure and giving way, crisp on the top, slightly yielding in the centre, with a crumb that's dense but not gummy. The technique here is simple, but the details matter: the chocolate and butter melt together low and slow, the sugar dissolves into the warm fat, and the eggs go in one at a time so they emulsify rather than scramble. Flour goes in last, folded gently, because overworking it develops gluten and takes the texture from fudgy to cakey. Pull them slightly underdone and let carryover heat finish them.
Chocolate and familiar company
Direct, warm soul songs suit the simple comfort of mixing brownies and waiting for the first warm square.
♫ Bill Withers Essentials — listen on Apple Music ↗Ingredients
- 7 oz / 200g Dark chocolate
- ⅔ cup / 150g Butter
- 1 cup / 200g Sugar
- 3 large + 1 egg yolk Eggs
- 1 tbsp / 15 ml Vanilla extract
- ¾ cup / 100g Flour
- pinch / 2g Salt
- 5 oz / 150g Dark chocolate, extra, — optional chocolate boost
Method
- Set a heatproof bowl over a saucepan of barely simmering water. The base of the bowl should not touch the water. Add the chopped dark chocolate and butter and let them melt together slowly, stirring occasionally, until completely smooth and glossy. Remove from the heat and leave to cool for 3–4 minutes. If using the optional chocolate boost, melt the extra 150g of dark chocolate separately in the same way, then fold it into the finished batter just before pouring into the tin for an even deeper, fudgier result.
- Whisk the sugar into the warm chocolate mixture until it dissolves and the mixture looks smooth and slightly shiny. Add the 3 whole eggs one at a time, whisking well after each addition, then add the egg yolk and whisk again. Each addition should be fully incorporated before the next goes in. The batter will look thick and glossy. Add the vanilla extract and whisk briefly to combine.
- Sift the flour and salt together and fold them into the chocolate mixture using a spatula, using large, sweeping strokes. Stop the moment no streaks of flour remain. A few turns past that point and the gluten tightens, making the brownies tough rather than fudgy.
- Pour into a lined, greased tin and spread level. Bake at 180°C / 350°F for 22–25 minutes. The brownies are ready when the top is set and slightly cracked but the centre still has a very faint wobble. They continue cooking as they cool. Leave in the tin until completely cool before cutting.
Red Velvet Cake
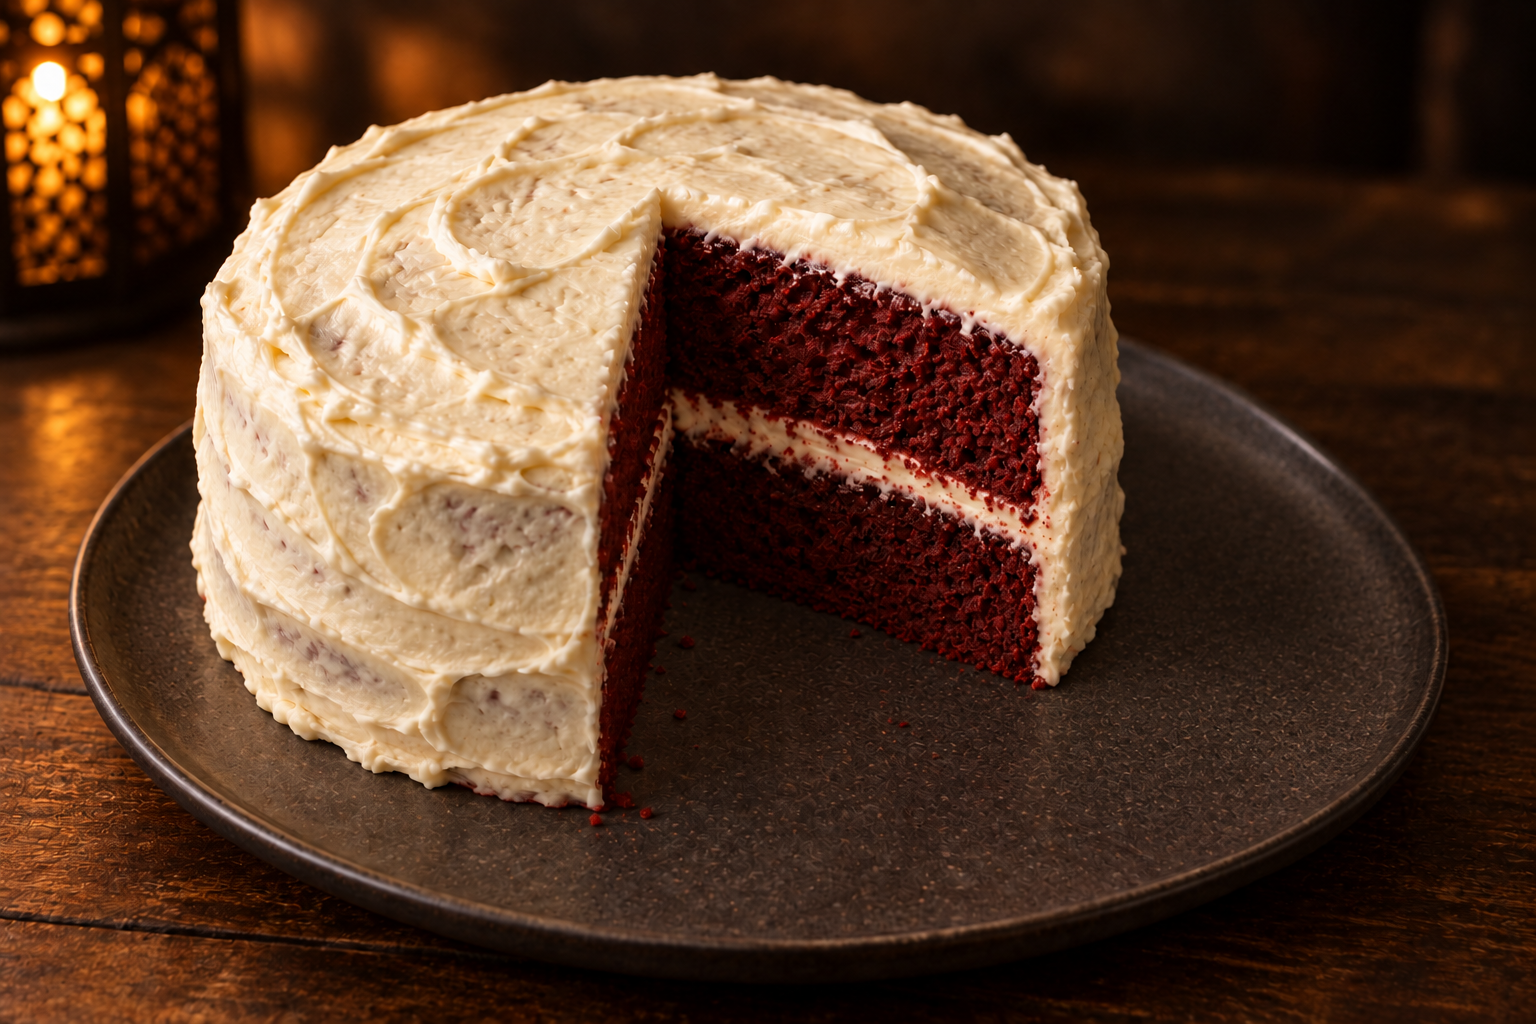
Red velvet cake is discipline dressed in drama. The vivid color draws attention, but the texture is what earns it. The crumb should be fine and tender, the buttermilk and vinegar reacting with the cocoa to soften the gluten and create that distinctive slight tang. The cream cheese frosting is not just decoration; the sharpness cuts the sweetness of the cake and brings balance to every bite. This is a recipe where each component reinforces the others, and the final result is far more than the sum of its parts.
A cake with occasion
Elegant phrasing and playful swing give frosting a red velvet cake a little celebratory glamour.
♫ Ella Fitzgerald Essentials — listen on Apple Music ↗Ingredients
- 2 cups / 250g Flour
- 1 tbsp / 10g Cocoa powder
- 1 cup / 200g Sugar
- ½ cup / 120g, softened Butter
- 2 Eggs
- 1 cup / 240 ml Buttermilk
- 1 tsp / 5g Baking soda
- 1 tsp / 5 ml Vinegar
- 1 tsp / 5 ml Vanilla extract
- 1–2 tbsp / 15–30 ml Red food coloring
- 8 oz / 225g, softened Cream cheese, — frosting
- 2 cups / 240g Powdered sugar, — frosting
- 2 tbsp Heavy cream or milk, — frosting
Method
- Beat the softened butter and sugar together in a stand mixer or with an electric hand whisk for 3–4 minutes until pale, fluffy, and noticeably increased in volume. This aeration is the structural foundation of the cake. Under-creamed butter produces a dense crumb. Scrape down the bowl halfway through so everything incorporates evenly.
- Add the eggs one at a time with the mixer running on medium, waiting for each egg to fully incorporate before adding the next. If the mixture looks like it's splitting or curdling, add a tablespoon of flour. This stabilizes the emulsion. The batter should look smooth and creamy between each addition.
- In a separate bowl, whisk together the flour, cocoa powder, and baking soda. Sift the mixture to remove any lumps. Cocoa in particular clumps and uneven pockets in the batter lead to uneven texture in the baked cake.
- With the mixer on low, add the dry ingredients and the buttermilk to the butter mixture alternately, starting and ending with the dry ingredients. This alternating method keeps the batter emulsified and prevents it from becoming too heavy or too wet at any single point. Add the red food coloring with the buttermilk.
- Add the white vinegar and vanilla extract last and mix briefly to combine. The vinegar reacts with the baking soda to create a final lift and also deepens the red hue of the cocoa. Don't overmix at this stage, just enough to incorporate.
- Divide the batter evenly between two greased and lined 20cm cake tins and bake at 180°C / 350°F for 28–32 minutes. The cakes are done when they spring back when lightly pressed in the centre and a skewer inserted in the middle comes out clean with no wet batter.
- Cool the cakes completely on a wire rack before frosting. A warm cake melts cream cheese frosting and it will slide off. Once cold, level the tops if needed with a serrated knife, then frost generously between the layers and across the top and sides.
Rooibos Panna Cotta
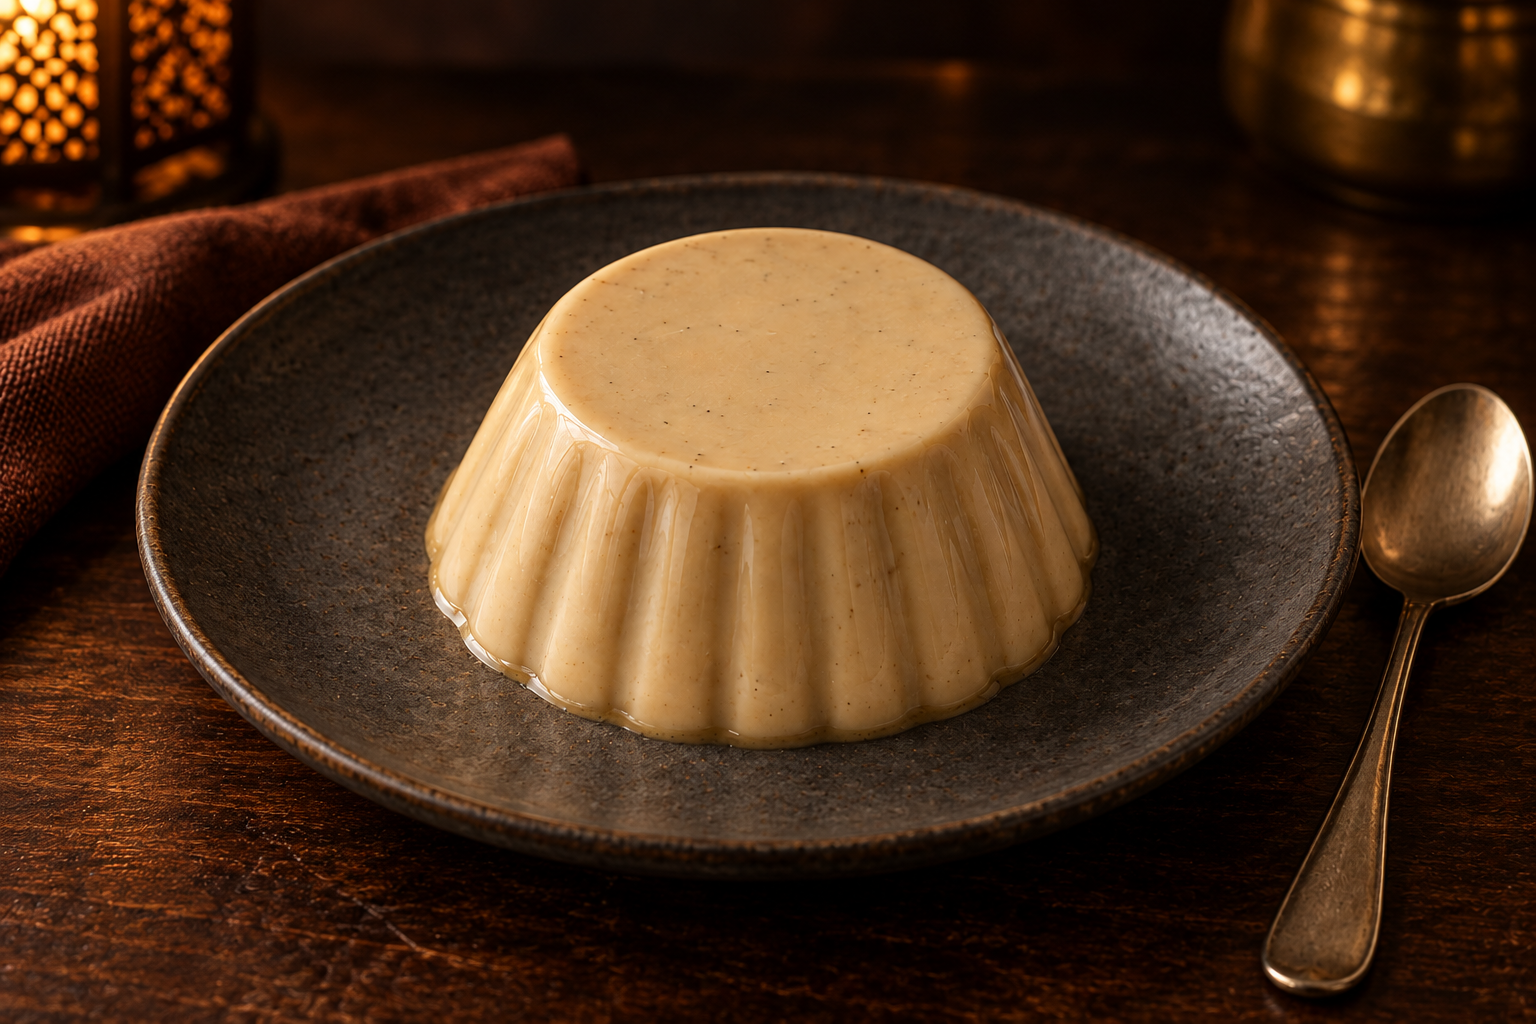
Rooibos panna cotta is quiet, elegant dessert. Soft enough to trembles when you carry it to the table, just firm enough to unmould cleanly. The rooibos steeps directly in the cream, infusing a warm, slightly floral earthiness that's unmistakably South African without being heavy or unfamiliar. The texture is the whole point: silky, cool, and melting against the tongue in a way that few other desserts achieve. It's a dessert that works best when everything restrains itself, no competing flavors, just clarity.
A quiet spoonful
Delicate piano-trio interplay echoes the light touch of a softly set dessert and a calm end to dinner.
♫ Bill Evans Essentials — listen on Apple Music ↗Ingredients
- 2 cups / 480 ml Heavy cream
- 1 cup / 240 ml Whole milk
- ⅓–½ cup / 70–100g Sugar, adjust to taste
- 2–3 tbsp loose leaf, or 3–4 tea bags Rooibos tea
- 2½ tsp / 7g Powdered gelatin
- 3 tbsp / 45 ml Cold water, — for blooming gelatin
- 1 tsp / 5 ml Vanilla extract
- pinch Salt
Method
- Sprinkle the powdered gelatin evenly over the cold water in a small bowl and leave to bloom for 5 minutes without stirring. The gelatin will swell and become spongy. This step is essential — un-bloomed gelatin added directly to hot liquid leaves uneven, grainy patches in the finished panna cotta.
- Combine the heavy cream, whole milk, and sugar in a saucepan. Add the rooibos tea bags or loose leaf in a fine strainer or muslin. Warm over low-medium heat, stirring occasionally, until the sugar dissolves and the liquid reaches a gentle simmer. Do not boil. Remove from the heat and steep for 7–8 minutes. The cream should turn a warm amber and smell of rooibos. Remove the tea bags or strain out the loose leaf.
- Add a pinch of salt and the vanilla extract to the warm cream. Add the bloomed gelatin and stir gently until it dissolves completely. The cream should still be warm enough to melt the gelatin without needing to reheat. If it has cooled too much, warm it briefly over very low heat while stirring — do not boil.
- Pour the mixture through a fine sieve into a jug to catch any remaining solids, then pour into lightly oiled moulds or serving glasses. Refrigerate for at least 4 hours, or overnight until firmly set. The panna cotta is ready when it holds its shape but trembles slightly at the edges when moved.
Rooibos & Hibiscus Tea (Finale)

This tea finishes a meal the way a good piece of music ends a set. Something that settles and completes rather than demands attention. Rooibos brings warmth and a natural sweetness, while hibiscus adds a tartness and a vivid, deep crimson color that looks deliberate and beautiful. Served chilled with a little honey dissolved through, it feels refined without effort. This is the kind of drink that lingers pleasantly and closes the experience on exactly the right note.
The last cup of the evening
Spacious piano patterns let conversation settle as the hibiscus and rooibos steep.
♫ Ludovico Einaudi Essentials — listen on Apple Music ↗Ingredients
- 10g or 4 bags Rooibos tea
- 1 liter / 4 cups Water
- optional Sugar
- 1 cup / 50g Dried hibiscus
- 1 liter / 4 cups Water
- ½ cup / 100g Sugar
Method
- Steep the rooibos and dried hibiscus flowers in separate mugs or small pots using water just below boiling, about 90°C / 195°F. Steeping at full boil can make rooibos slightly bitter and hibiscus very tart. Leave both to steep for 8–10 minutes; you want full extraction from both without astringency.
- Strain both teas into a single pitcher, tasting as you combine. The balance of rooibos warmth and hibiscus tartness is a personal preference. Add more rooibos for something rounder and gentler, more hibiscus for a sharper, more vivid result. Stir in honey or sugar while the tea is still warm so it dissolves completely.
- Refrigerate the tea until completely cold before serving. This is not a drink that benefits from being served warm, and the color is far more striking when chilled. Serve over ice in clean glasses with a thin slice of orange or a few fresh hibiscus petals if available. The deep crimson should be visible through the glass.
Tiramisu

Tiramisu is restraint at its most elegant. Coffee, cream, and time layered into something that's soft, balanced, and more complex than the handful of ingredients suggests. The mascarpone cream should be light, not dense; the ladyfingers should be damp from the espresso but not waterlogged; and the whole thing needs a proper rest in the fridge to set and allow the flavors to settle into each other. Made the day before and served cold, this is one of the most satisfying desserts in the canon.
Espresso after dark
Classic lounge vocals turn espresso, cream and cocoa into an after-dinner ritual worth lingering over.
♫ Frank Sinatra Essentials — listen on Apple Music ↗Ingredients
- ~24 pieces / 200g Ladyfingers
- 1 cup / 240 ml, cooled Strong espresso
- 1 cup / 250g Mascarpone
- 1 cup / 240 ml Heavy cream
- 2, yolks only — use pasteurized eggs for safety Eggs
- ½ cup / 100g Sugar
- 1 tsp / 5 ml Vanilla extract
- for dusting Cocoa powder
Method
- Separate the eggs and place the yolks in a large bowl. Using a hand whisk or electric mixer, beat the egg yolks with the sugar until pale, thick, and creamy, about 2–3 minutes. Add the mascarpone and beat until completely smooth. In a separate chilled bowl, whip the cold heavy cream with the vanilla extract until it holds soft peaks. Fold the whipped cream into the mascarpone mixture in two or three additions using a spatula and gentle sweeping strokes. The final cream should be light, airy, and hold its shape. Note: this recipe uses raw egg yolks. For anyone pregnant, elderly, or immunocompromised, use pasteurized eggs.
- Brew a strong espresso or very strong coffee and let it cool completely before using. Warm coffee accelerates the soaking and makes it too easy to over-saturate the ladyfingers. Add a splash of coffee liqueur or dark rum if desired. Pour the cooled espresso into a shallow dish wide enough to dip the ladyfingers.
- Dip each ladyfinger briefly into the espresso — a quick in-and-out on each side is all it takes. You want them moistened and coffee-flavored throughout, not soft and dripping. A light dip creates the right texture: slightly firm to the touch but giving way to a soft, damp interior. Over-soaked ladyfingers make a soggy, textureless base.
- Layer the soaked ladyfingers in a single row across the base of your serving dish, then spread half the mascarpone cream over the top in an even layer. Repeat with a second layer of dipped ladyfingers, then the remaining cream. Smooth the surface and dust generously with cocoa powder through a fine sieve. Cover and refrigerate for at least 4 hours. Overnight is better and gives a noticeably more cohesive, settled result.
Chicken Lollipops

Chicken lollipops are tactile, fun, and visually distinctive. The drumette shaped so the meat is pushed to one end and the bone acts as a handle, making them perfect party food or a playful starter. The shaping takes patience but sets the whole dish apart from ordinary wings. Once shaped and coated, they fry into something crisp and golden all the way around with meat that stays juicy inside. The visual impact when they're piled on a platter is immediate and impressive for something that comes together with straightforward technique.
Small bites, big welcome
Bright soul and polished pop give party preparation a celebratory lift as the chicken lollipops take shape.
♫ Natalie Cole Essentials — listen on Apple Music ↗Ingredients
- 12 pieces Chicken drumettes
- 1 cup / 120g Flour
- ½ cup / 60g Cornstarch
- 1 tsp / 5g Paprika
- 1 tsp / 5g Garlic powder
- 1 tsp / 6g Salt
- 2 Eggs
- for frying Oil, — or cooking spray (for baking)
Method
- Hold each drumette with the narrow end pointing up. Use a sharp knife to cut through the tendons and thin skin around the top of the bone, then push the meat firmly downward with your fingers, scraping along the bone as you go. The meat should gather and bunch at the thicker end, exposing a clean bone handle at the top. It takes a little pressure and patience. Uniform shaping means even cooking.
- In a shallow bowl, combine plain flour, cornstarch, garlic powder, smoked paprika, and salt. Whisk to combine. The cornstarch is key: it reduces gluten and gives the crust a lighter, crispier texture than flour alone.
- Beat an egg with a splash of water or buttermilk in a second bowl. Dip each lollipop in the egg wash, letting any excess drip off, then dredge firmly in the flour mixture, pressing the coating onto every surface. Set on a rack and rest for 5–10 minutes so the coating adheres before cooking.
- To fry: Heat the oil to a steady 350°F (175°C) and lower the lollipops in carefully, bone-end up. Fry for 8–10 minutes, turning once or twice, until the coating is deep golden all the way around. Drain on a rack and season immediately with a pinch of salt. Confirm the chicken is cooked through by checking the internal temperature reaches 165°F (74°C).
- To bake: Preheat the oven to 425°F (220°C). Place the coated lollipops on a wire rack set over a lined baking sheet and spray lightly with cooking spray. Bake for 25–30 minutes, flipping once halfway through, until the coating is golden and crisp. Check that the internal temperature reads 165°F (74°C) before serving. Season immediately. Serve with a dipping sauce alongside.
Rooibos Cake
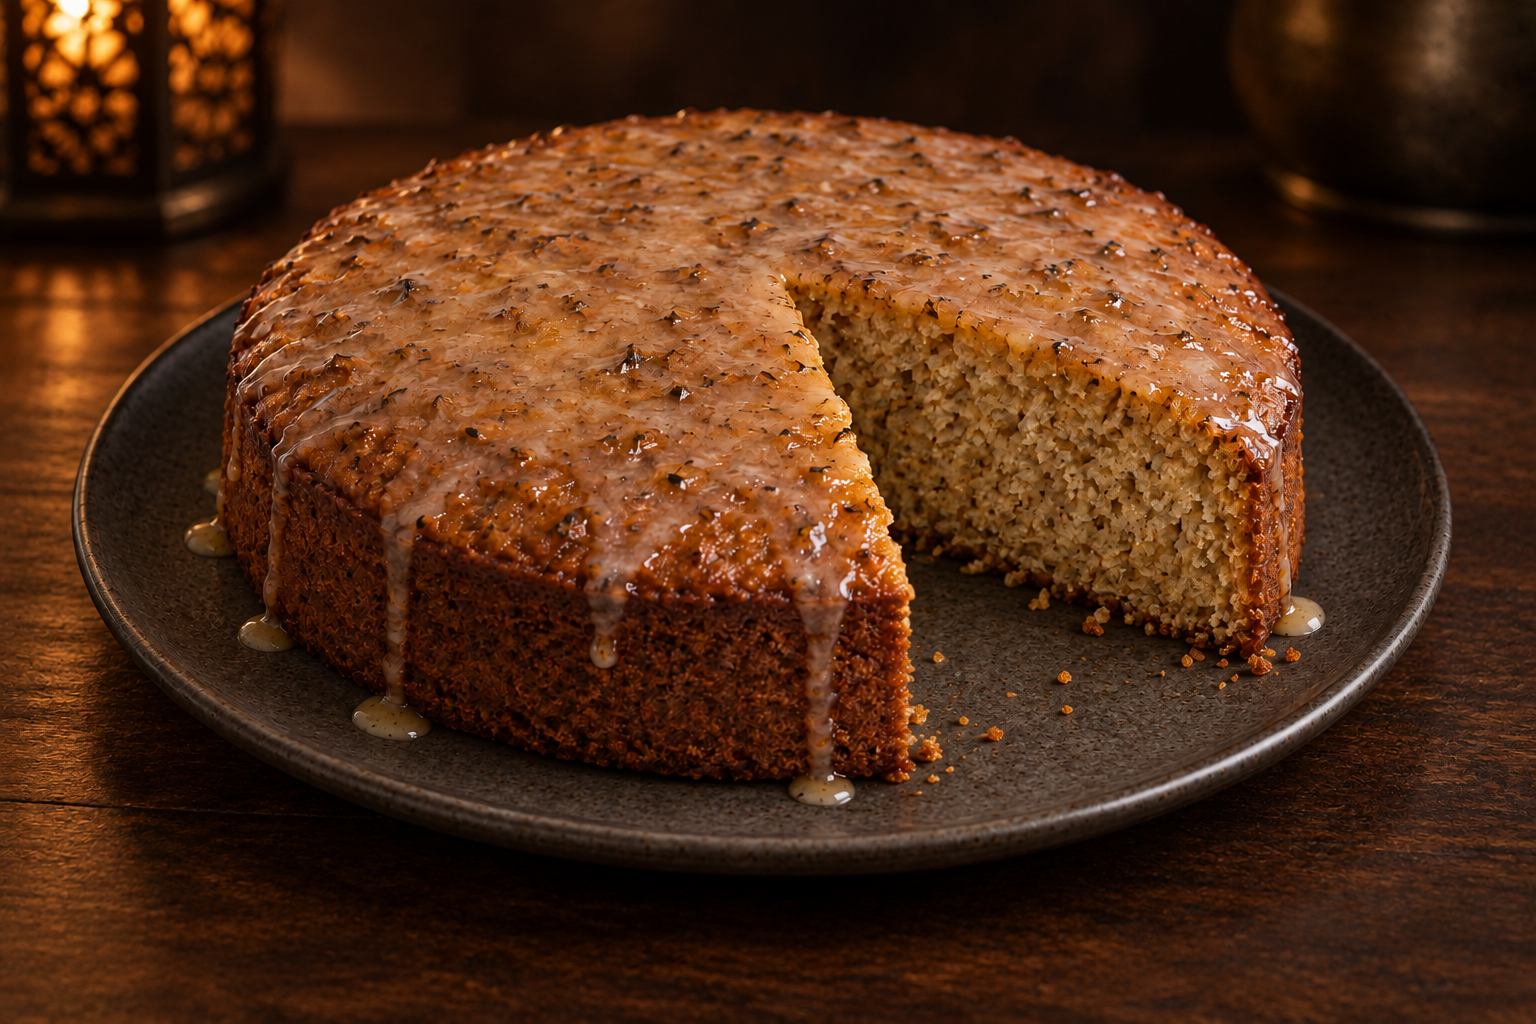
Rooibos cake is subtle in the way that good baking often is. The flavor isn't loud, but it's unmistakably present as a warm, slightly sweet earthiness that comes through in every bite. The brewed tea replaces part of the liquid in the batter, infusing the crumb as it bakes. The result is a cake that's moist, gently spiced, and fragrant without leaning on extract or artificial flavor. It's the kind of bake that works equally well with morning tea or as a simple dessert with whipped cream.
Tea, cake and a softer room
Restrained trumpet and intimate vocals leave space for an aromatic cake and an unhurried cup of tea.
♫ Chet Baker Essentials — listen on Apple Music ↗Ingredients
- 2 cups / 250g Flour
- 1 cup / 200g Sugar
- 2 Eggs
- ½ cup / 120g, softened Butter
- ½ cup / 120 ml Strong rooibos tea
- 1 tsp / 5g Baking powder
- ¼ tsp / 1g Ground cinnamon
- ¼ tsp / 1g Mixed spice, — optional, or use extra cinnamon
- ¼ tsp / 2g Salt
- 1 cup / 120g Powdered sugar, — rooibos glaze
- 2–3 tbsp, cooled Strong brewed rooibos tea, — rooibos glaze
Method
- Beat the softened butter and sugar together for 3–4 minutes until pale and noticeably fluffy. This step aerates the fat and creates the structure that gives the cake its even, tender crumb. Don't rush it. Under-creamed butter produces a denser, heavier cake.
- Add the eggs one at a time, beating well after each addition and scraping the bowl down between eggs. If the mixture begins to look curdled or separated, add a tablespoon of flour to bring it back. This re-emulsifies the batter and prevents a coarse crumb in the final cake.
- Brew a strong cup of rooibos tea. Use two tea bags and steep for 5–6 minutes to get a concentrated, deeply amber infusion. Let it cool completely before adding to the batter. Warm tea added to the butter mixture can melt the fat and deflate the air you've worked in.
- Sift together the flour, baking powder, ground cinnamon, and mixed spice (if using), then fold the dry ingredients into the butter mixture alternately with the cooled rooibos tea. Start and end with the dry ingredients. Use a spatula and fold gently rather than beating; overworking the batter at this stage develops gluten and makes the cake tough.
- Pour into a greased and lined tin and bake at 180°C / 350°F for 30–35 minutes until risen, deep golden on top, and springy when lightly pressed in the centre. A skewer inserted in the middle should come out clean. Cool in the tin for 10 minutes before turning out onto a wire rack.
- To make the rooibos glaze, sift the powdered sugar into a bowl and stir in the cooled strong rooibos tea a tablespoon at a time until the glaze is smooth, thick, and pourable but not runny. It should coat the back of a spoon and fall in a slow ribbon. Once the cake has cooled completely on a wire rack, spoon the glaze evenly over the top and allow it to drip naturally down the sides. Leave to set for 10–15 minutes before slicing.
Salad Bowl (Chef Yandz Balanced Bowl)
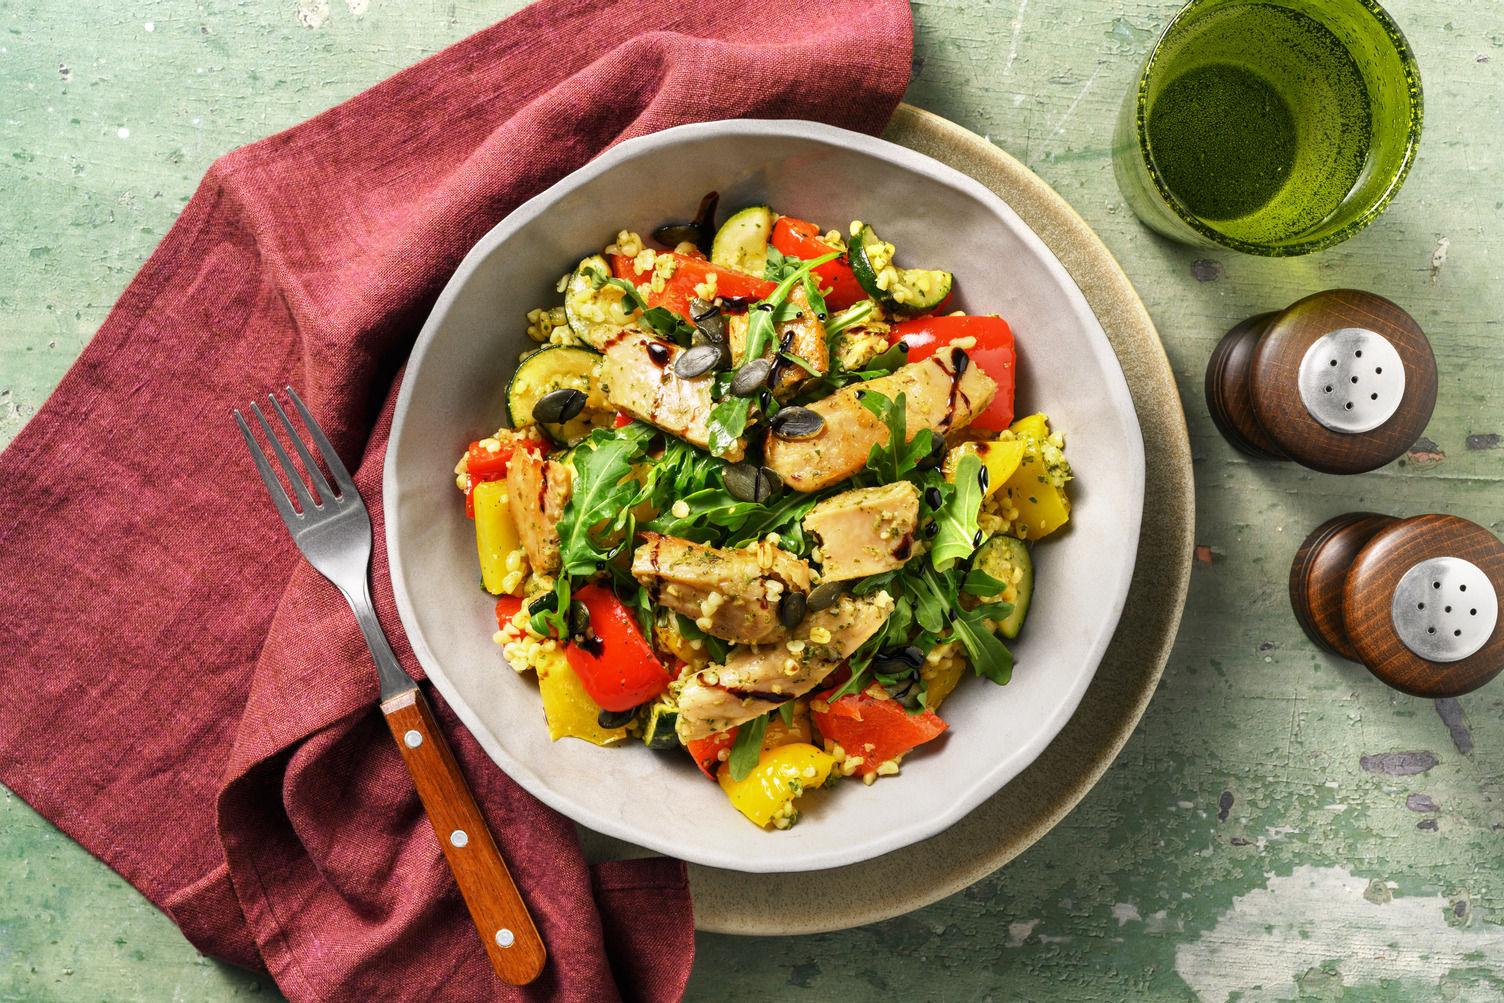
This salad bowl is a complete dish built around balance. Every element has a role, and the components are chosen so that texture, acidity, fat, and freshness all show up in each forkful. Massaging the kale is not optional: it breaks down the fibrous structure and transforms the leaves from tough and bitter to silky and slightly sweet. The rest of the bowl adds crunch, protein, and brightness in layers. This is real food that leaves you satisfied rather than reaching for something else twenty minutes later.
Fresh colors, winding grooves
Fluid guitar and bass lines bring an easy contemporary pulse to chopping vegetables and building a colorful bowl.
♫ Khruangbin Essentials — listen on Apple Music ↗Ingredients
- 4 cups / 150g Kale
- 3 cups / 100g Mixed greens
- 1 cup cooked / 200g Quinoa or grain of choice
- 2 Avocado
- 1 cup / 150g Cherry tomatoes
- ¼ cup / 35g Pumpkin seeds
- ¼ cup / 35g Sunflower seeds
- ¼ cup / 35g Dried cranberries
- ¼ cup / 35g Almonds or mixed nuts, — omit or replace with extra seeds for nut allergy
- 2 tbsp / 30 ml Olive oil
- 2 tbsp / 30 ml Lemon juice
- 3–4 tbsp Dressing of choice
- ¾ tsp / 4g Salt
Method
- Strip the kale leaves from their tough stems and tear into bite-sized pieces. Drizzle with a small amount of olive oil, a squeeze of lemon juice, and a pinch of salt. Using your hands, massage the kale firmly for 2–3 minutes, squeezing and turning it repeatedly. The leaves will shrink, darken, and soften noticeably. You're breaking down the cell structure that makes raw kale tough. It should feel silky when it's ready.
- Add the remaining bowl components: your choice of cooked grain (farro, quinoa, or brown rice all work well), any roasted vegetables, avocado, cherry tomatoes, and toppings for crunch and sweetness — pumpkin seeds, sunflower seeds, dried cranberries, and almonds or mixed nuts. Layer them over the massaged kale rather than mixing everything in at once so each component stays distinct and the bowl keeps texture. Omit the nuts or replace with extra seeds if serving anyone with a nut allergy.
- Drizzle your dressing of choice lightly across the bowl just before serving and toss gently to distribute it without flattening all the layers. The bowl should have visible texture and color variation: green, orange, white, red, and the deep purple of the cranberries. A well-built salad bowl looks as good as it eats.
Chicken Pot Pie
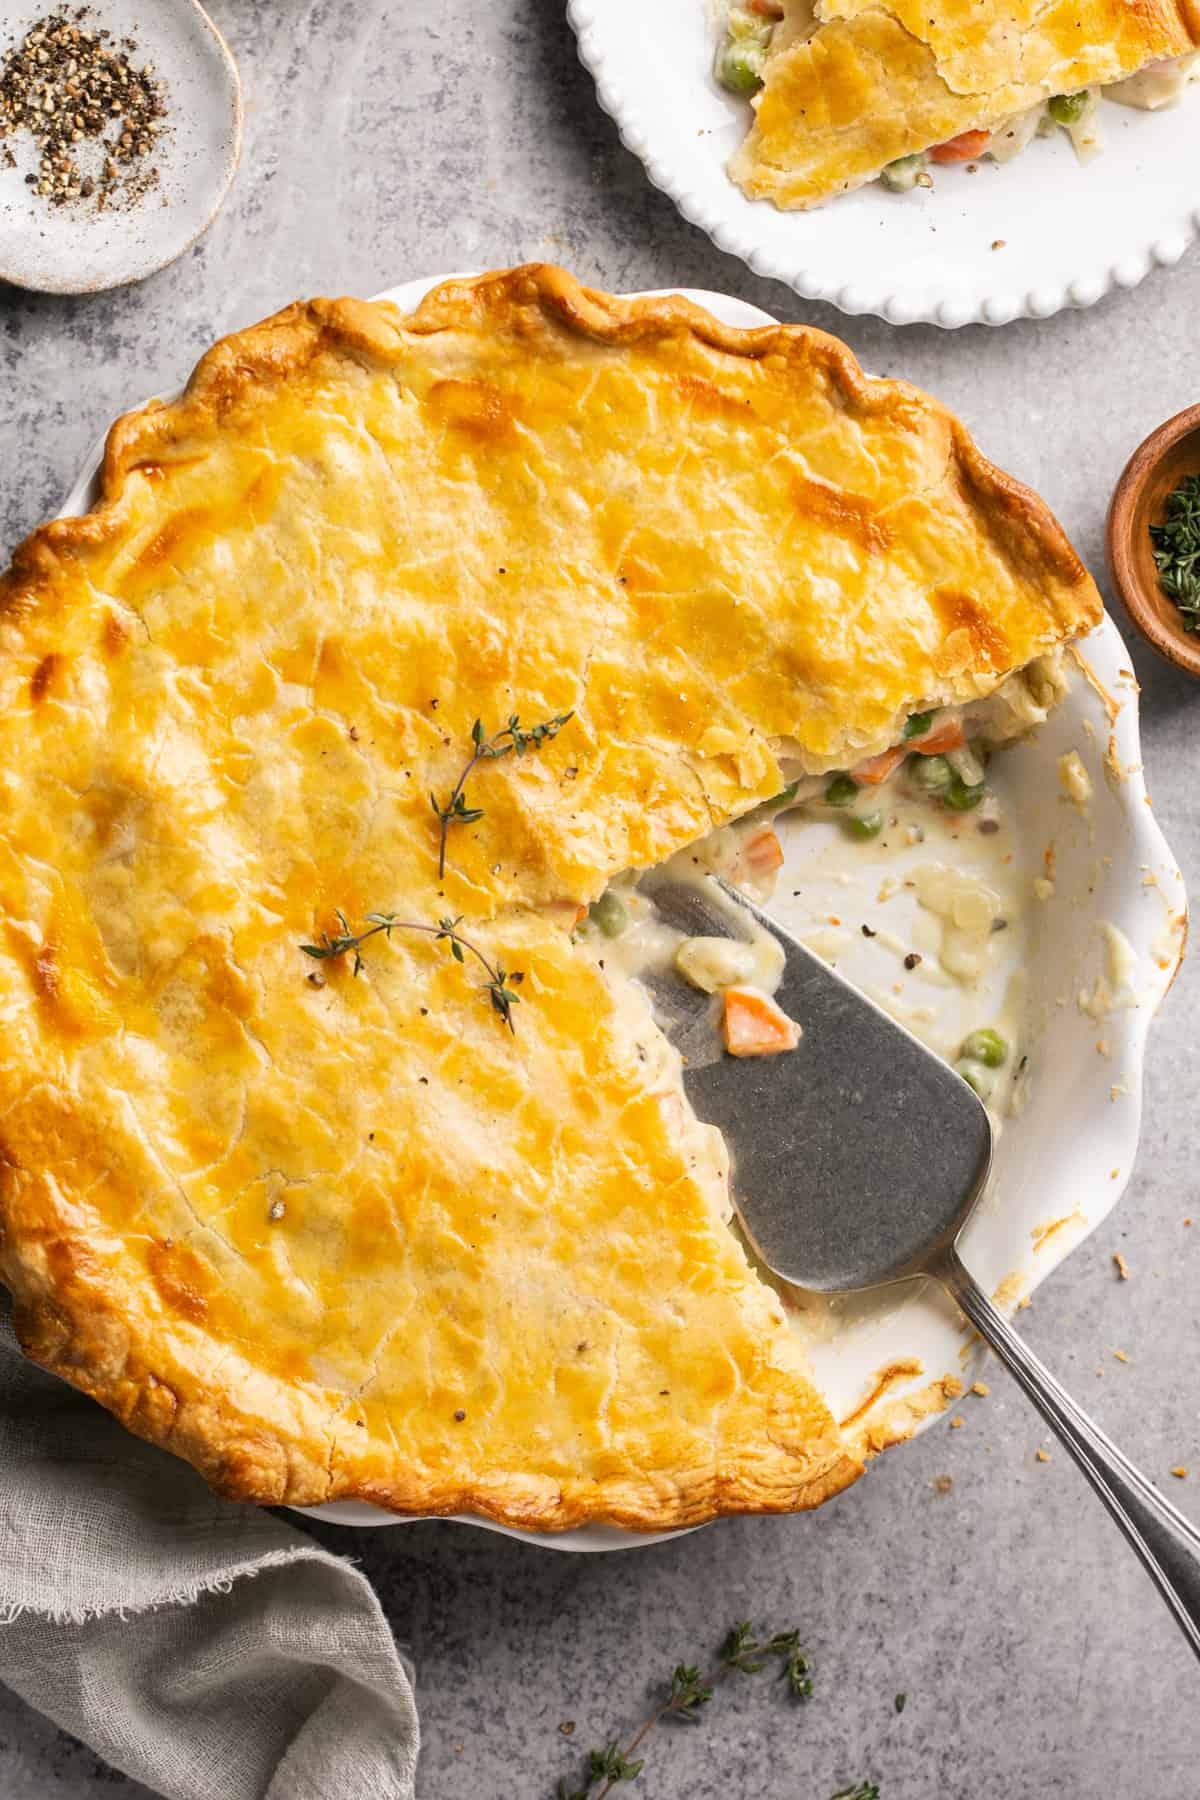
Chicken pot pie is classic comfort food that rewards careful technique at every stage. The filling should be silky and well-seasoned with a sauce that's thickened but not stodgy, the vegetables tender but not collapsed, and the pastry golden and shattering. The classic mistake is a filling that's too wet, which makes the pastry base soggy, or too thick, which makes it feel heavy and glue-like. Get the roux-based sauce right and everything else follows: a proper pot pie that's deeply satisfying and holds together when you cut into it.
Comfort beneath a pastry lid
Playful, familiar piano warmth suits rolling pastry and watching a pot pie turn golden.
♫ Vince Guaraldi Essentials — listen on Apple Music ↗Ingredients
- 1.3 lbs / 600g, shredded Cooked chicken
- 4 tbsp / 60g Butter
- 1 medium / 150g, diced Onion
- 1 cup / 120g, diced Carrots
- ¾ cup / 100g, diced Celery
- 2 cloves / 10g Garlic
- ½ cup / 60g Flour
- 2 cups / 500 ml Chicken stock
- ½ cup / 120 ml Cream
- 1 cup / 150g, optional Peas or corn
- 1 tsp / 6g Salt
- ½ tsp / 3g Black pepper
- 1 sheet Puff pastry or pie dough
- 1 egg + 1 tbsp water Egg wash
Method
- Melt the butter in a wide, oven-safe pot over medium heat and add the diced onion, carrot, and celery. Cook for 6–8 minutes, stirring occasionally, until completely softened and the onion is translucent. Add the minced garlic for the final minute and stir so it doesn't catch. This soffritto base is the flavor foundation of the filling.
- Stir in the plain flour and cook it into the vegetables for 1–2 minutes, stirring constantly, until it smells slightly toasty and loses its raw, powdery smell. This roux will thicken the sauce. Cooking out the flour before the liquid goes in prevents a floury, pasty taste in the finished filling.
- Add the chicken stock gradually, whisking constantly as each addition incorporates before the next goes in. Once all the stock is in, add the cream and bring to a gentle simmer, stirring. The sauce should thicken noticeably and coat the back of a spoon. If it looks too thick, add more stock; too thin, simmer a few minutes more.
- Stir in the cooked, shredded or diced chicken and any optional vegetables like peas or corn. Season generously. Pot pie filling needs more salt than you might expect because the pastry absorbs some of the seasoning as it bakes. The filling should taste slightly over-seasoned before it goes under the pastry.
- Transfer the filling to a suitable baking dish and allow to cool slightly before topping with the pastry. A very hot filling will melt the butter in the pastry before it bakes, affecting the texture. Lay the pastry over, trim any excess, crimp the edges to seal, and brush the top with beaten egg wash.
- Bake at 200°C / 400°F for 25–30 minutes until the pastry is deep golden, puffed, and the filling is bubbling at the edges. Cut a small vent in the top pastry at the start of baking to allow steam to escape. Without it the pastry can puff unevenly and the filling steams rather than reducing slightly.
Orange Chicken (Chef Yandz Balanced Version)

Orange chicken walks a fine line between bright and cloying, and this version stays firmly on the right side of it. The sauce is sticky and glossy but pulled back by soy's salt and ginger's sharpness, so the orange reads as citrus rather than candy. The chicken needs to be genuinely crispy before it meets the sauce, because the coating absorbs the glaze and goes soft within minutes. Toss it at the last possible moment and serve immediately. The result is bold, balanced, and a restaurant-style result that's faster than ordering in.
A bright finish to the day
Sparkling piano runs match lively preparation and the shine of a fresh orange glaze.
♫ Oscar Peterson Essentials — listen on Apple Music ↗Ingredients
- 1.3 lbs / 600g, cubed Chicken thighs
- 1 cup / 120g Flour
- ½ cup / 60g Cornstarch
- 2 Eggs
- 1 tsp / 6g Salt
- ½ tsp / 2g White pepper
- for frying Oil
- ¾ cup / 180 ml, fresh Orange juice
- 1 tbsp Orange zest
- 2 tbsp / 30 ml Soy sauce
- ⅓ cup / 80 ml Honey
- 2 cloves / 10g Garlic
- 1 tbsp / 10g Ginger
- 1 tbsp cornstarch + water Cornstarch slurry
Method
- Beat an egg lightly and toss the chicken pieces through to coat, then dredge through a mixture of plain flour, cornstarch, salt, and white pepper. Press the coating on firmly. The cornstarch is what creates the light, almost translucent crust. Without it the coating is heavier and less crisp. Fry in oil at 350°F (175°C) in small batches for 5–7 minutes until golden, crisp, and cooked through to 165°F (74°C). Drain on a wire rack.
- In a small saucepan, combine freshly squeezed orange juice, orange zest, soy sauce, honey, minced garlic, and grated fresh ginger. Bring to a simmer over medium heat, stirring to combine. The sauce should smell bright and layered. Citrus forward, with the soy and ginger underneath.
- In a small bowl, whisk together cornstarch and cold water to make a slurry, then pour it into the simmering sauce while stirring. Cook for 1–2 minutes until the sauce turns glossy and thick enough to coat a spoon. It should look lacquered, not translucent. Taste and balance. Add more soy for saltiness, more honey for sweetness, more orange for brightness.
- Add the fried chicken to the sauce and toss quickly to coat every piece. Work fast. The coating absorbs the sauce within a minute or two and loses its crispness. Serve immediately over steamed rice.
Gochujang Pasta (Afro-Cali Fusion)
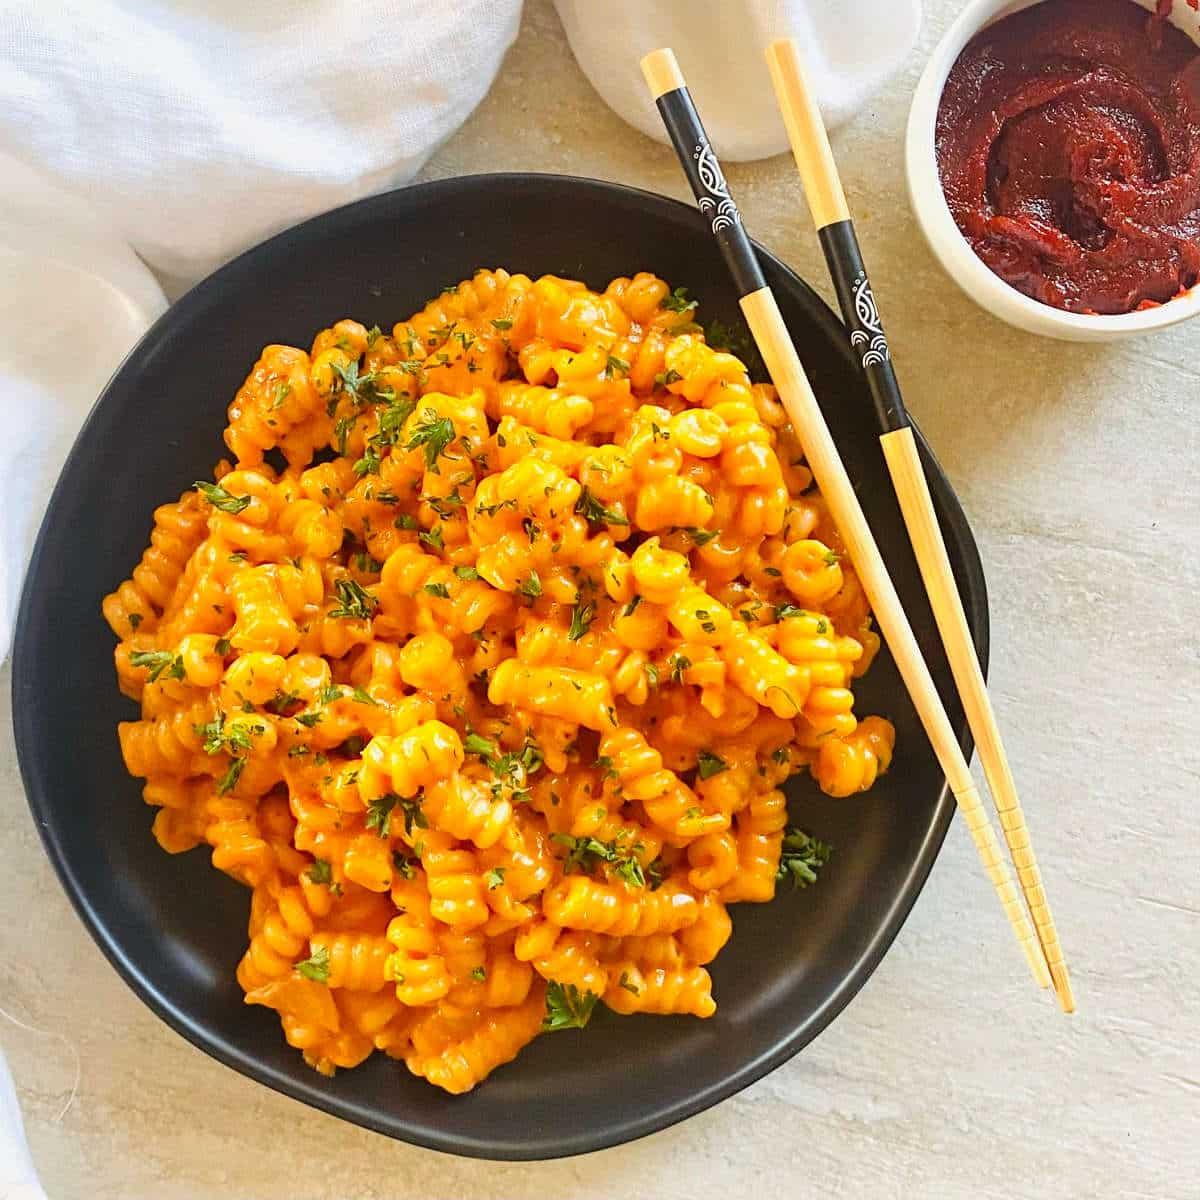
Gochujang pasta is a fusion that earns its place. The Korean fermented chili paste brings a deep, complex heat that's nothing like fresh chili, rounded by cream into something rich and slightly smoky. It's bold without being aggressive, and the pasta water ties the sauce to the noodles so it clings rather than pools. This is a weeknight dish that tastes considered, cooks in 20 minutes, and is the kind of thing that becomes a regular because of how satisfying it is. The layered flavor builds slowly and finishes bright.
An unexpected weeknight mix
Layered beats and mellow electronic textures suit a pasta that brings familiar comfort and a different kind of heat together.
♫ Downtempo Dinner Party — listen on Apple Music ↗Ingredients
- 10 oz / 300g Pasta
- 3 tbsp / 40g Butter
- 3 cloves / 15g Garlic
- 2 tbsp / 30g Gochujang
- 1 cup / 240 ml Cream
- ½ cup / 50g Parmesan
- ½ cup reserved Pasta water
Method
- Cook the pasta in heavily salted water. It should taste like the sea, until just al dente, about 1–2 minutes less than the packet time. Before draining, scoop out at least a full cup of the starchy pasta water. This liquid is what will bind and loosen the sauce later; don't skip it.
- While the pasta cooks, melt the butter in a wide pan over medium heat. Add the minced garlic and cook gently for 1–2 minutes until fragrant and light golden. Keep the heat medium. The garlic should soften and sweeten, not brown and turn bitter.
- Add the gochujang paste to the pan and stir it into the butter and garlic, letting it cook for 30–45 seconds over the heat. This brief toasting blooms the fermented flavors and deepens the color. The paste will smell intensely of fermented chili. That's exactly right.
- Pour in the cream and stir to combine with the gochujang, then bring to a gentle simmer. Let it reduce for 2–3 minutes, stirring occasionally, until the sauce looks glossy and slightly thickened. Taste for heat and salt. Gochujang varies in intensity between brands.
- Add the drained pasta directly to the sauce along with a generous splash of the reserved pasta water. Toss vigorously over medium heat for 1–2 minutes. The starchy water emulsifies with the cream and butter, creating a sauce that coats every strand rather than sitting in the base of the pan.
- Remove from heat and finish with finely grated parmesan, stirring through until melted. Taste and adjust. More pasta water to loosen, more parmesan for depth. The final dish should be glossy, well-coated, and deeply savory with a building warmth from the gochujang.
Gooey Cinnamon Rolls

Gooey cinnamon rolls are an exercise in enriched dough. Soft and pillowy rather than dense and dry, with layers of butter, cinnamon, and sugar that melt together as they bake into something caramelized and deeply fragrant. The dough needs two rises to develop proper structure and a light, open crumb, and the rolls need to be cut evenly so they bake at the same rate. Pull them just before they look fully done: carryover heat finishes them, and the gooey center you want is the result of taking them out slightly early, not late.
A slow morning with a little lift
Buoyant violin-led swing keeps rolling dough and stirring icing cheerful as cinnamon fills the kitchen.
♫ Stephane Grappelli Essentials — listen on Apple Music ↗Ingredients
- 3½ cups / 450g Flour
- 1 cup / 240 ml, warm Milk
- 7 tbsp / 100g, softened Butter, — dough
- ½ cup / 100g Sugar
- 2¼ tsp / 7g, instant Yeast
- 2 Eggs
- ½ tsp / 3g Salt
- ¾ cup / 150g Brown sugar, — filling
- ⅓ cup / 80g, softened Butter, — filling
- 2 tsp / 10g Cinnamon, — filling
- 4 oz / 115g, softened Cream cheese, — cream cheese frosting
- 1½ cups / 180g Powdered sugar, — cream cheese frosting
- ½ tsp Vanilla extract, — cream cheese frosting
- 1–2 tbsp Milk or cream, — cream cheese frosting
Method
- Make the enriched dough by combining flour, sugar, salt, instant yeast, warm milk, softened butter, and eggs. Mix until the dough comes together, then knead for 8–10 minutes until it's smooth, elastic, and slightly tacky but not sticky. It should spring back slowly when poked. Place in a lightly oiled bowl, cover with a damp cloth, and leave to rise at room temperature for 1–1.5 hours until roughly doubled in size.
- Turn the risen dough out onto a lightly floured surface and roll into a rectangle about 40x25cm and 5mm thick. The dough should be even in thickness across the whole surface so the rolls bake uniformly. If it springs back as you roll, let it rest for 5 minutes. The gluten is tense and needs to relax.
- Spread the surface evenly with softened butter, not melted, which runs off, then scatter generously with a mixture of brown sugar and cinnamon. Press the filling lightly into the butter so it adheres. Roll the dough tightly from the long edge, pulling slightly as you roll to keep it compact and even. A loose roll means the layers open up during baking.
- Slice the log into even rounds using a sharp knife or unflavoured dental floss. About 4–5cm thick. Arrange cut-side up in a greased baking tin with a small gap between each roll. They should be close but not touching; they'll proof toward each other and fill the tin. Cover and proof for 30–45 minutes until visibly puffed.
- Bake at 180°C / 350°F for 20–25 minutes until the tops are golden and the rolls look set but still have a slight jiggle in the very centre. A skewer at the edge should come out clean; the middle might still look very soft. That's correct. Cool for 5 minutes before glazing with cream cheese icing or a simple sugar glaze while still warm.
- While the rolls bake, make the cream cheese frosting. Beat the softened cream cheese until smooth, then add the powdered sugar and vanilla extract and mix until fully combined. Add the milk or cream a tablespoon at a time until the frosting is thick and spreadable — it should hold its shape but spread easily. Spoon generously over the rolls while they are still warm so the frosting softens into the layers. Serve immediately or leave for 5 minutes to let the frosting settle slightly before pulling apart.
Real cooking
From the kitchen
Recipes, techniques, and inspiration from Chef Y & Z


Member experiences · Planned for 2027
Beyond your kitchen. Around our table.
Make room for something worth sharing. Chef’s Parcel is planning local experiences for members, beginning in Los Angeles in 2027.
A seat at something special
Intimate gatherings, memorable food, and good company. We’re planning member experiences that bring the Chef’s Parcel table to life.
Your members’ calendar
Starting in Los Angeles in 2027. Event dates and booking details will be announced as plans are confirmed.
Exclusively for members
Additional event fees apply. Experiences are planned for 2027; reservations are not open yet.
Be first to the table
Get updates on parcels, recipes, and the Chef’s Parcel app.